fruit

Caramelized Banana Upside-Down Coconut Cake & Coconut Whipped Cream

I don’t remember the first spice I ever purchased with my own money, but I’m betting it was a packet of McCormick® chili seasoning. And I’m betting it was during my senior year of college. I lived in a cozy apartment above my professor’s garage. It was furnished with a blue couch from Goodwill that was missing its back legs, a twin bed, a sturdy desk, a dresser, and a couple of plants I was doing my best to keep alive.

There wasn’t a kitchen, but there was a fridge downstairs in the garage and a microwave in my room. Mike assembled an electric skillet for me (he likes to say, “remember that skillet I built you?”) as well. My makeshift “kitchen” wasn’t much, but since I’d left the comfort (and cost) of a meal plan behind the previous year, it would have to do.

Many of my meals were hot dogs and quesadillas, usually devoured with lots of salsa while watching The Cosby Show, or People’s Court. But I did call my mom and ask her to send over her chili recipe — the one we ate with peanut butter maple syrup sandwiches when I was little.

Heading to the grocery store to buy the chili ingredients was the beginning of a new adventure for me. In those days, the aisles and ingredients were unfamiliar, and I ambled to and fro searching for each item. Each line of the recipe flooded my head with new questions: Where are the canned tomatoes? Do I buy dry beans or canned? Where is the spice aisle? How lean do I want my ground beef? Wait, do I own a spoon?

I do remember my mom specifying that she used McCormick’s chili seasoning though. And I remember sprinkling the packet on my ground beef just as she’d instructed. And finally, I remember the utter satisfaction of sitting down with a bowl full of cheesy, sour creamy, spicy chili (and watching A Different World, no doubt) that I’d made myself.

McCormick is definitely a part of my earliest cooking memories, and it claims a huge chunk of my spice rack (or really, spice shoe organizer) today. Far from being stuck in the past, though, the company released the McCormick Flavor Forecast 2012 on Tuesday.

This report, compiled by chefs, sensory scientists, trend trackers, marketing experts, and food technologists, highlights up-and-coming flavor trends around the world. It’s used both to guide the company’s product development as well as to inspire home cooks with new flavor combinations.

While McCormick has been producing a Flavor Forecast since 2000, this year’s report is the first to be global in scope. It’s organized into six trends: Honoring Roots, Quest for the Ultimate, Veggies in Vogue, Simplicity Shines, Flavorful Swaps, and No Boundaries. Each trend includes two innovative spice and ingredient combinations to spark your culinary creativity.

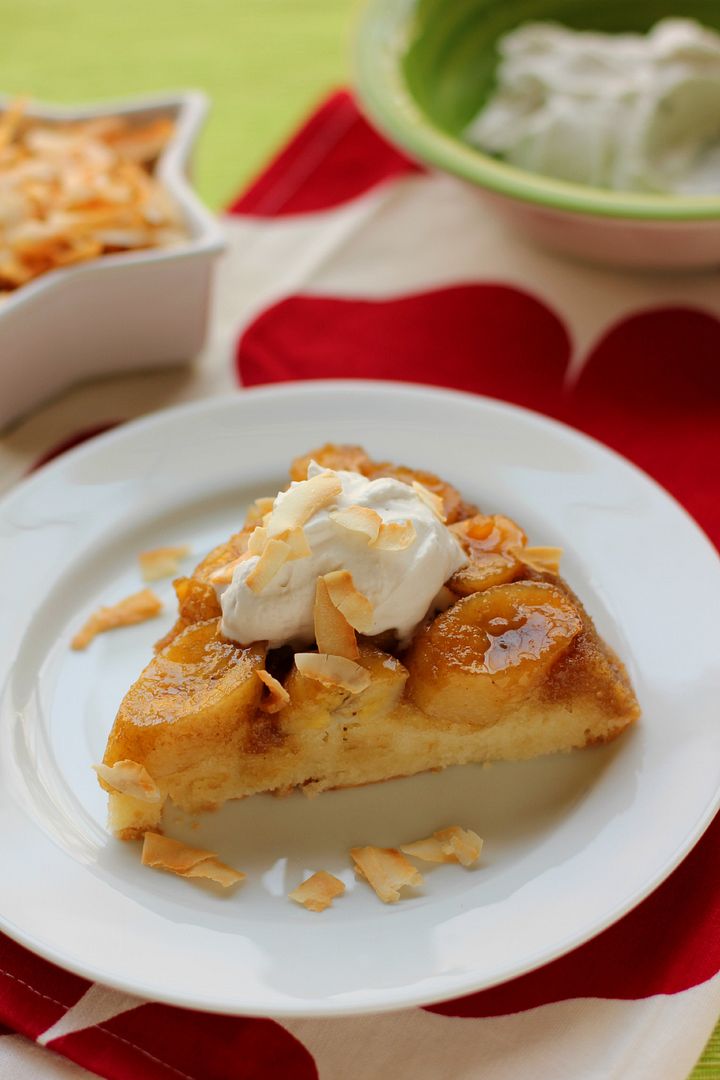
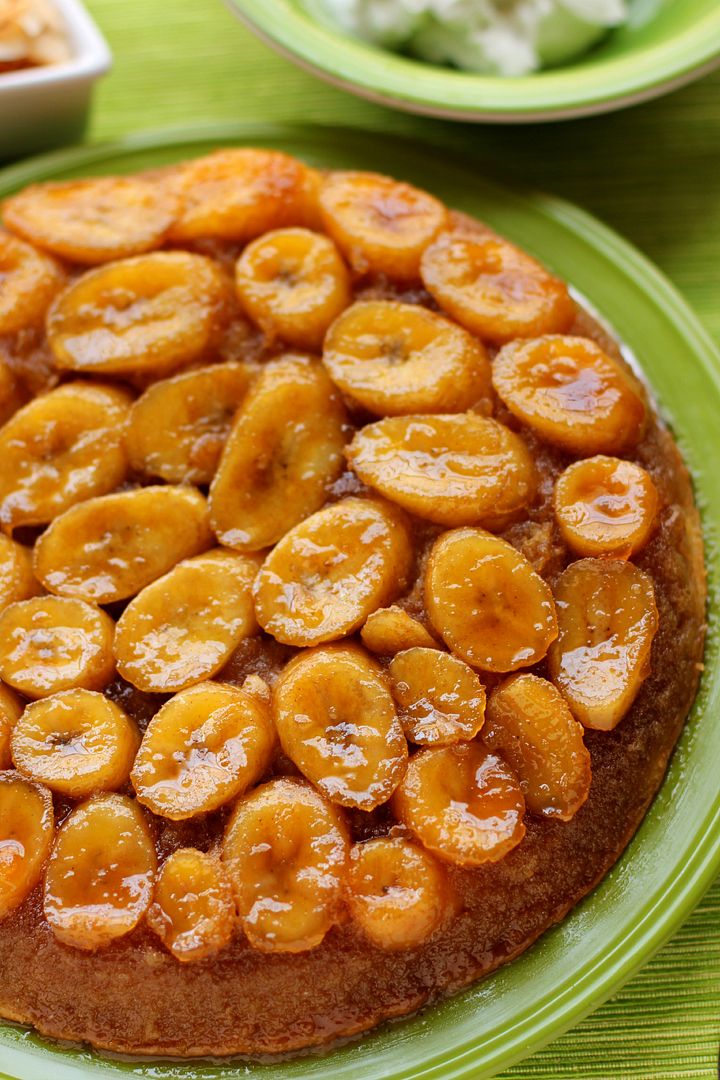
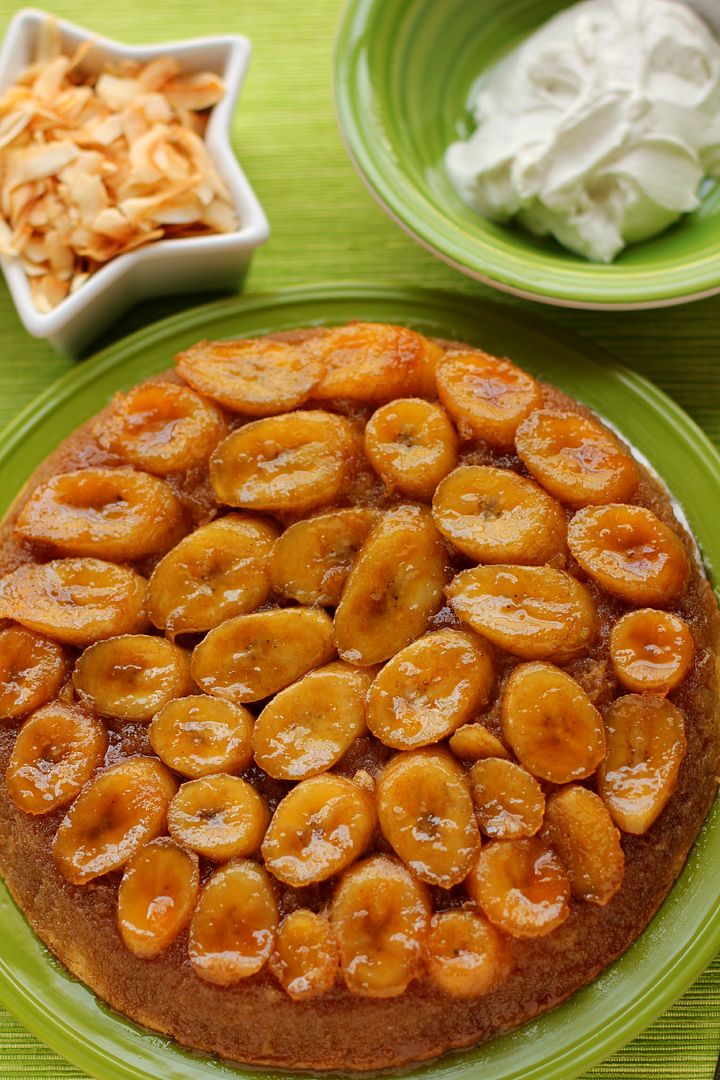
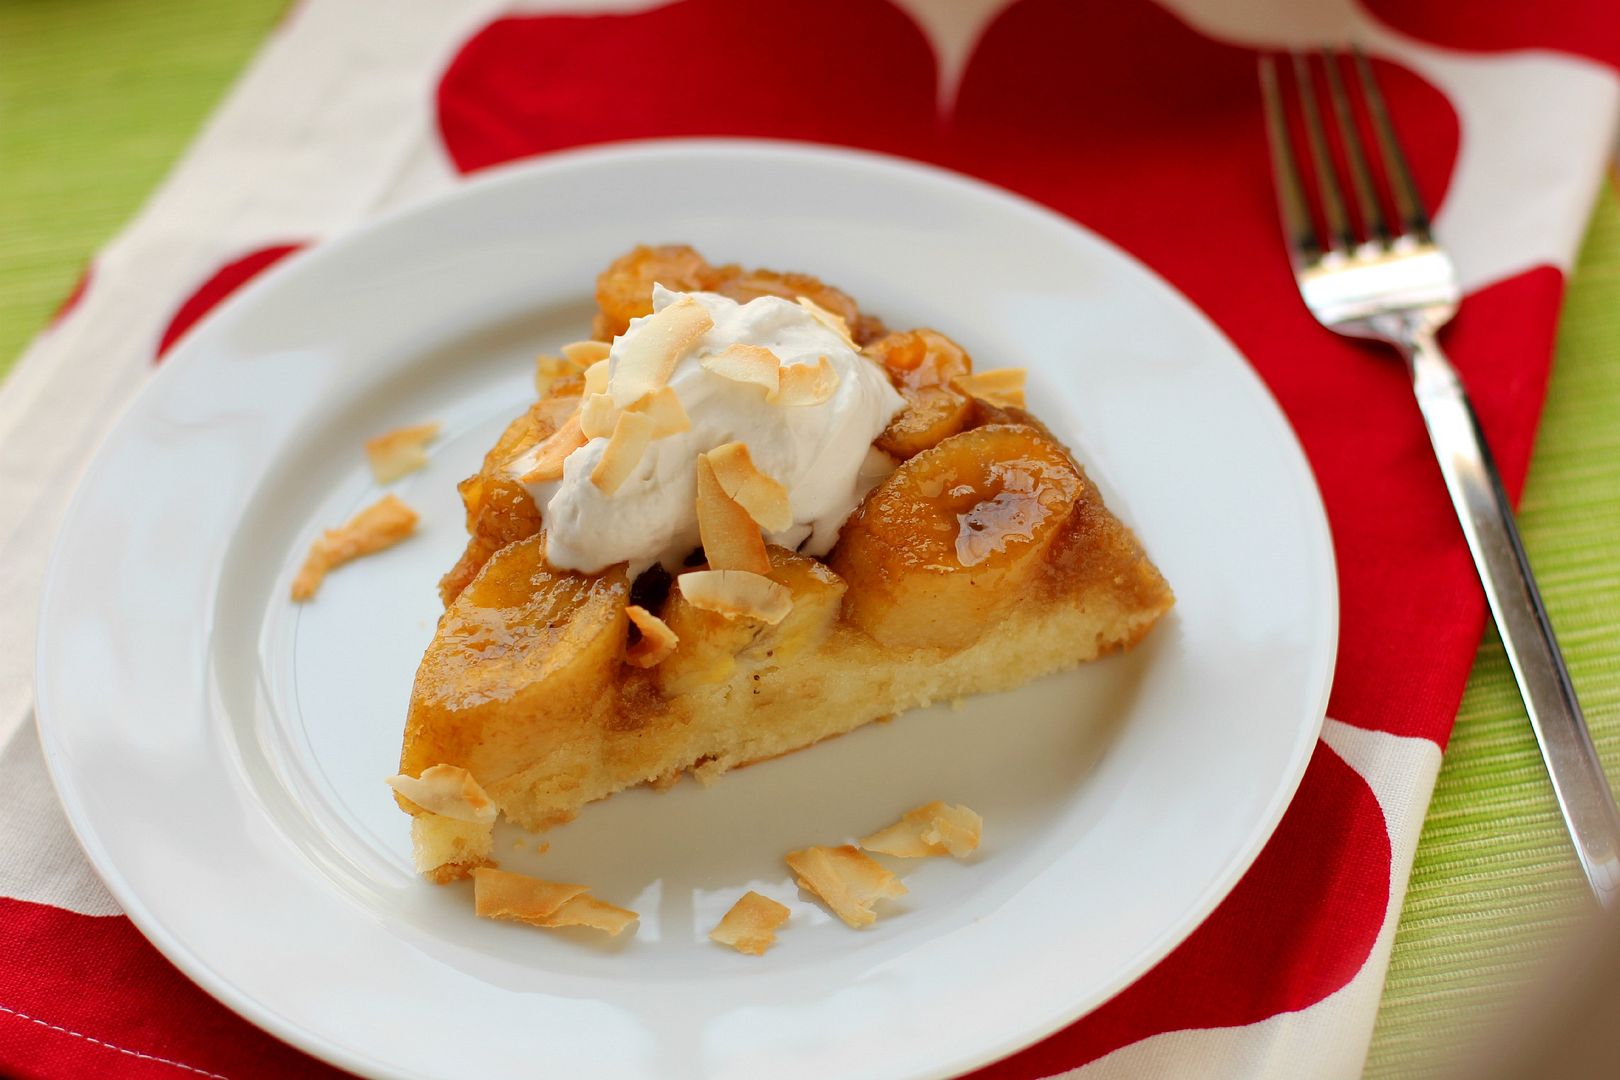
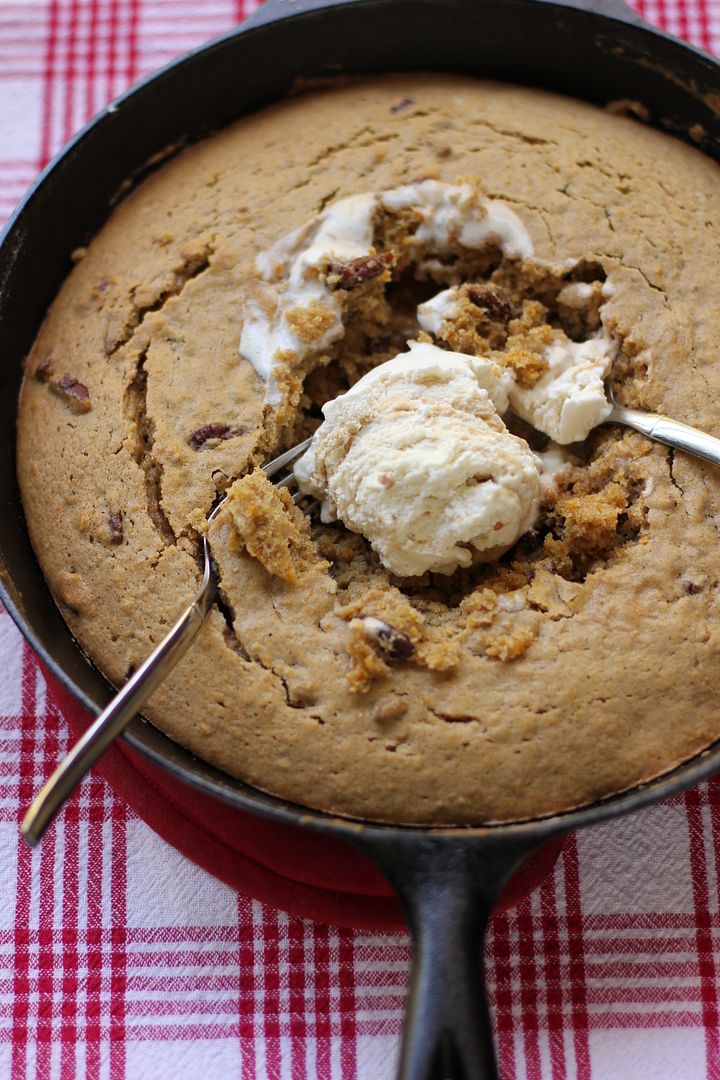
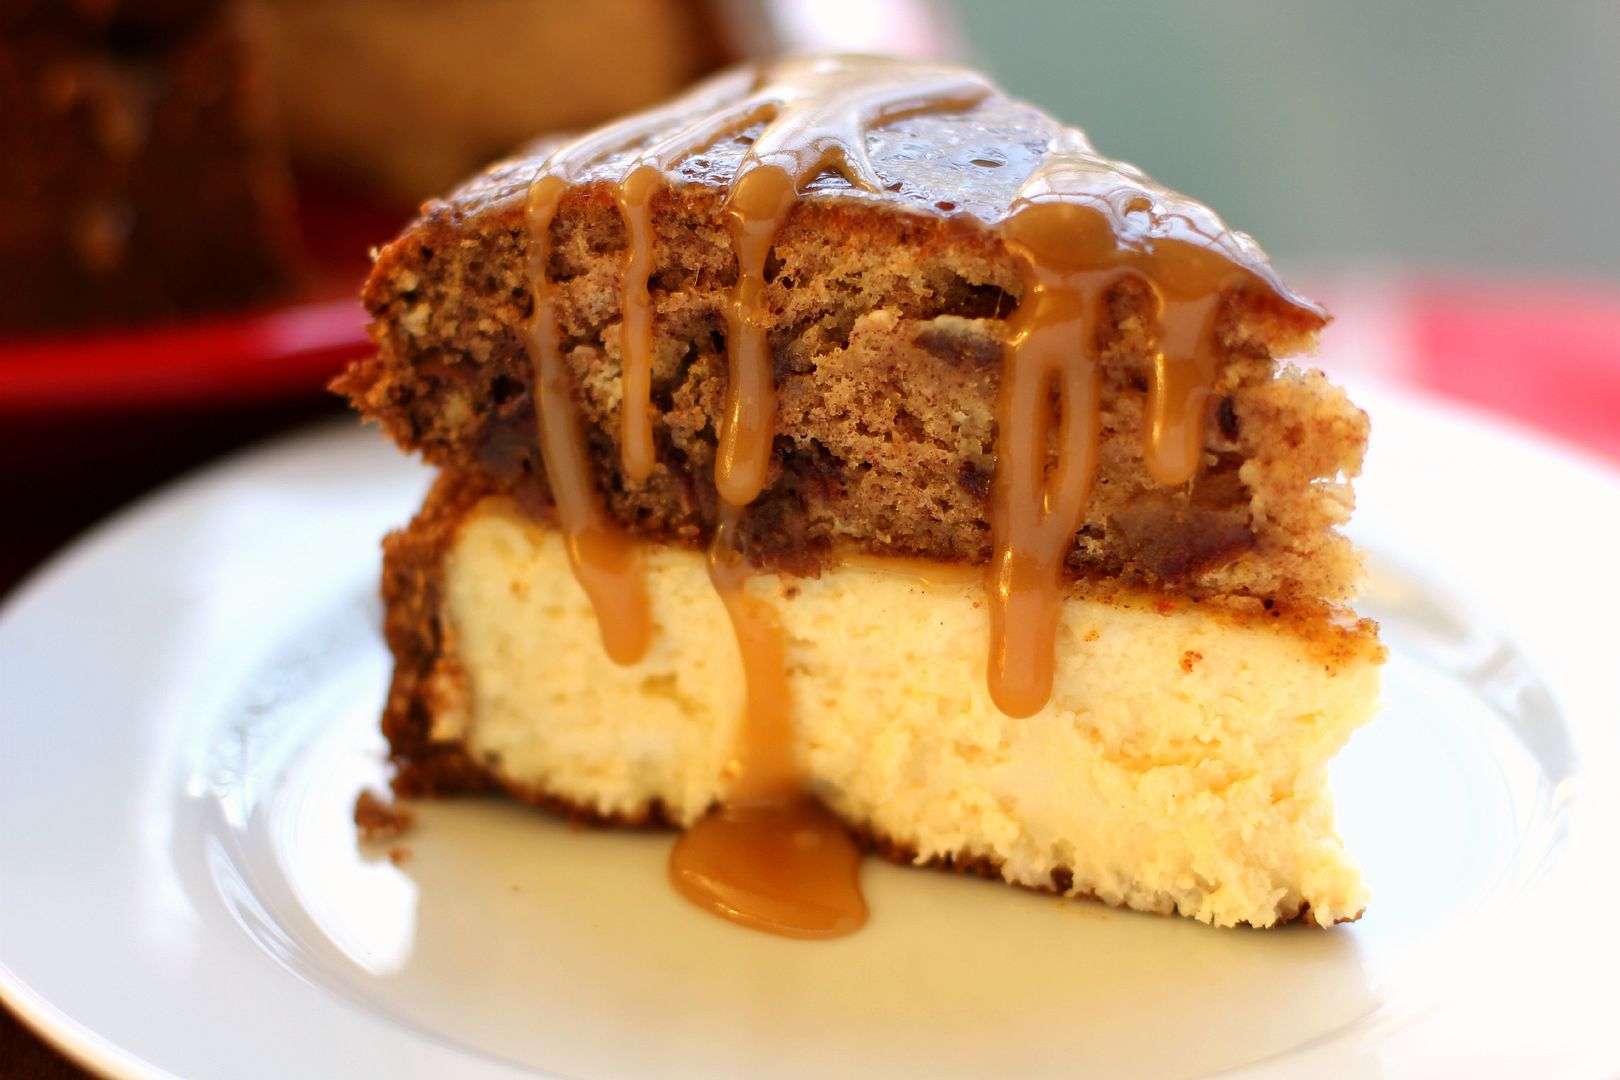
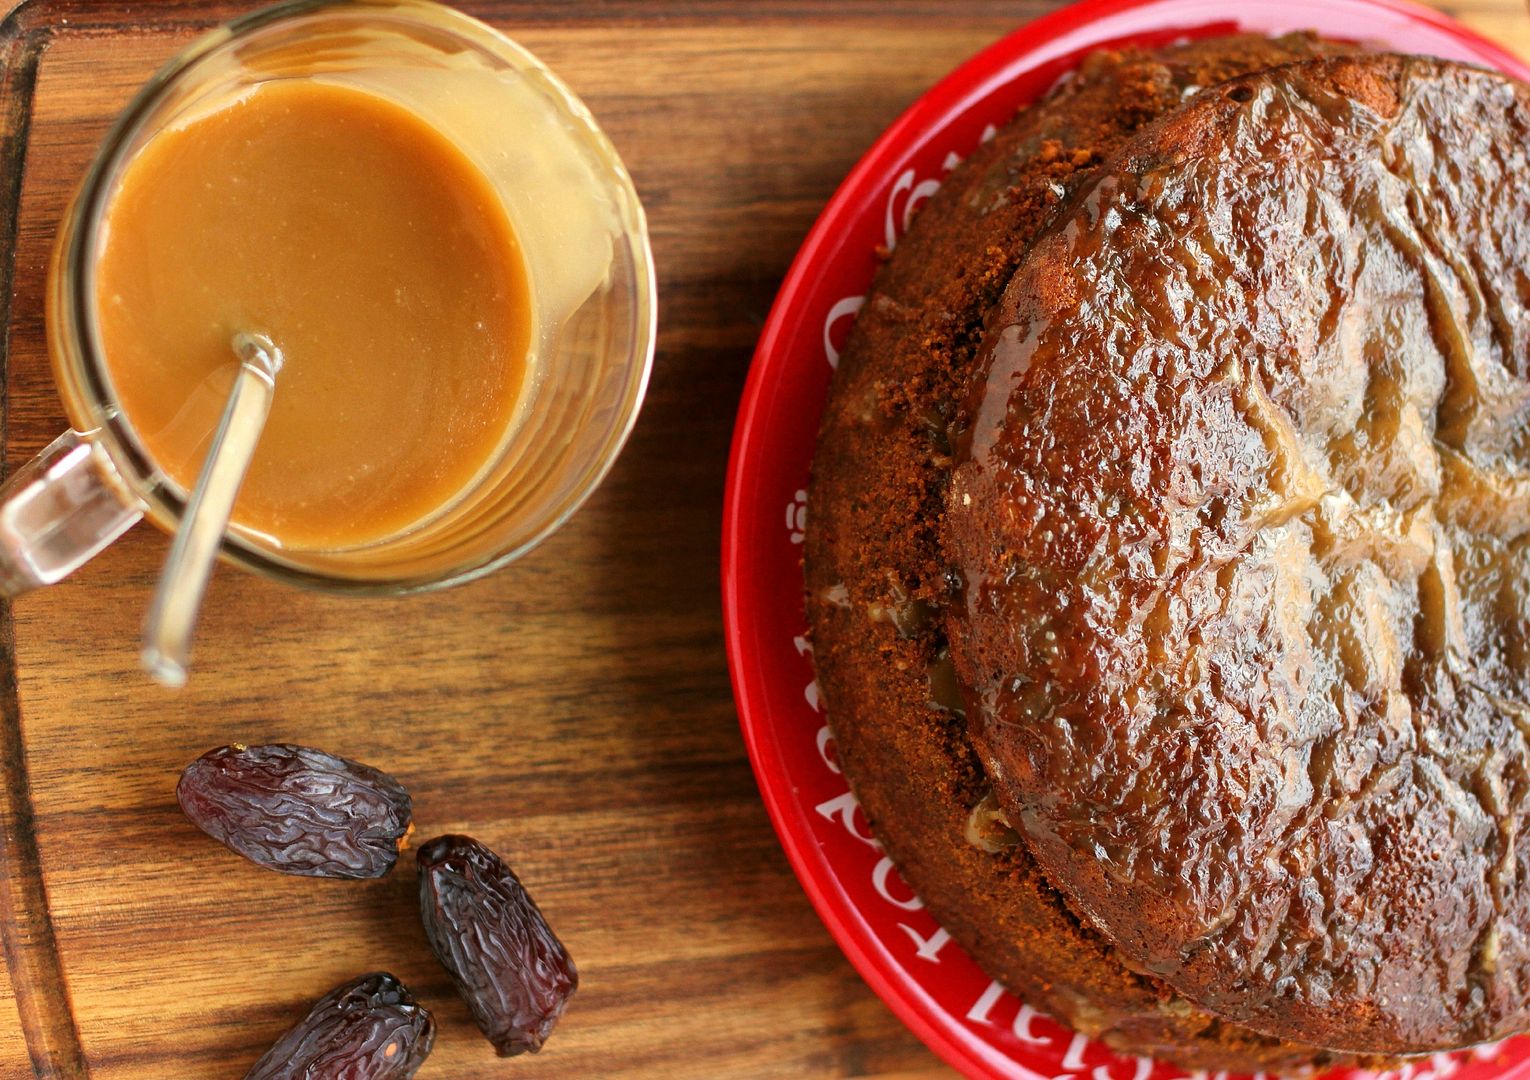
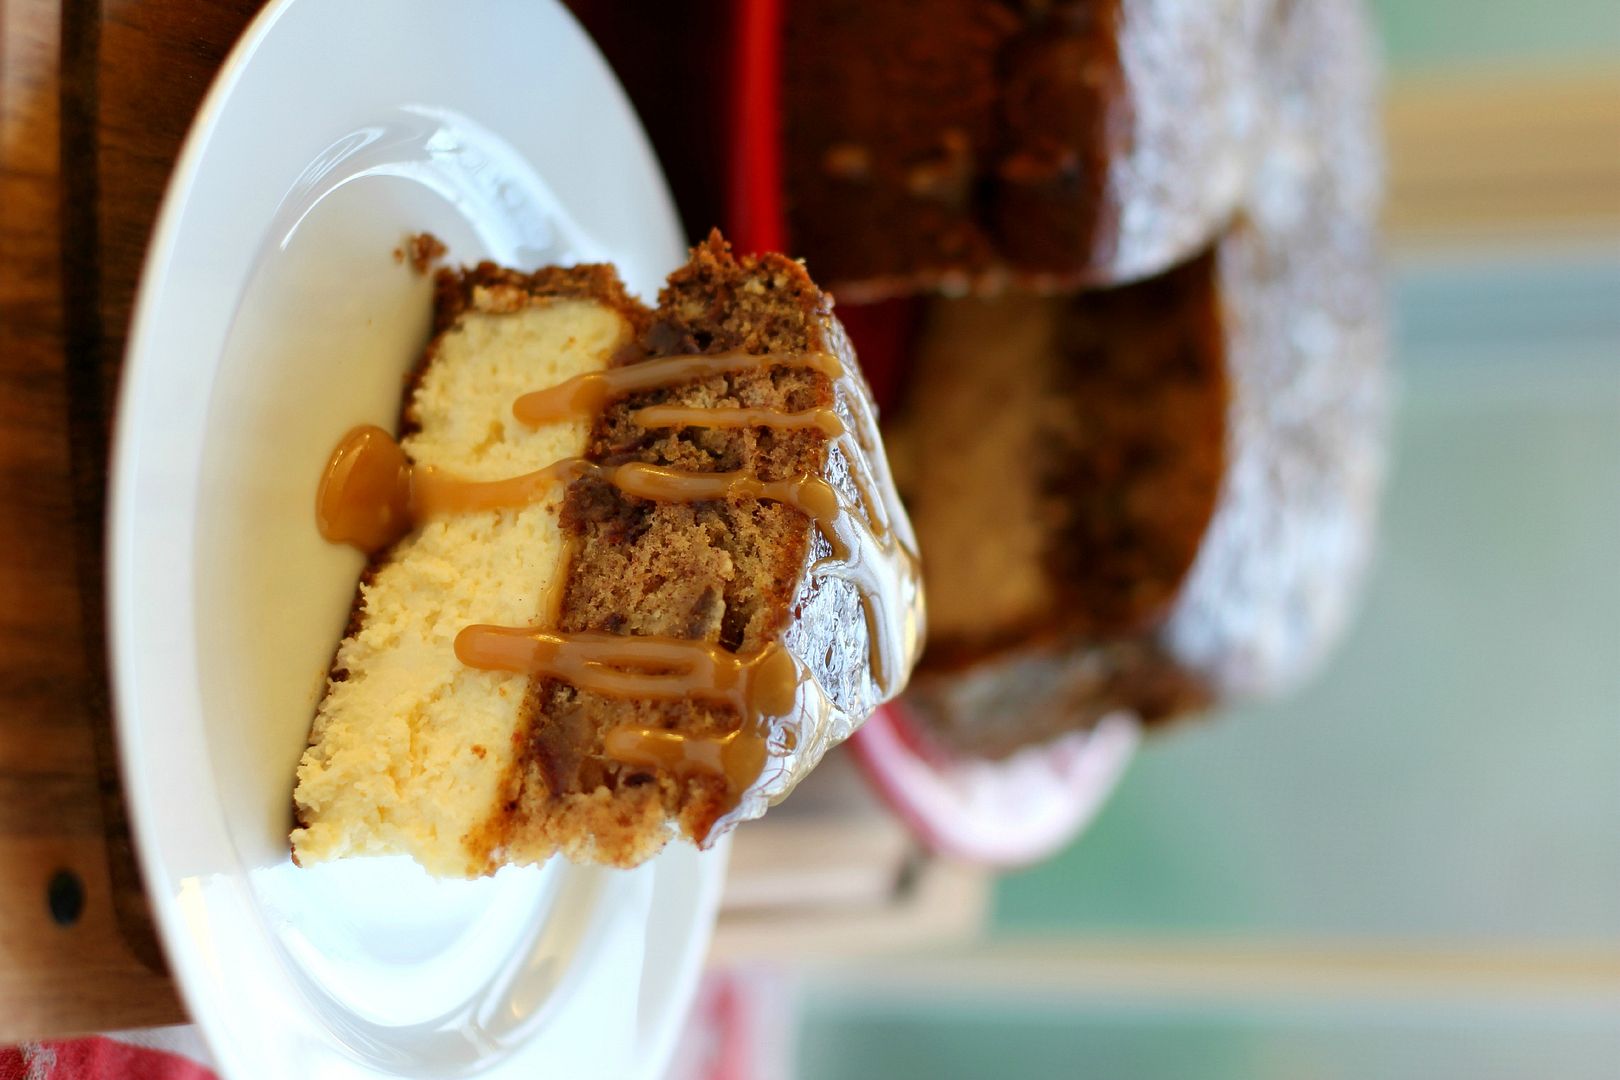
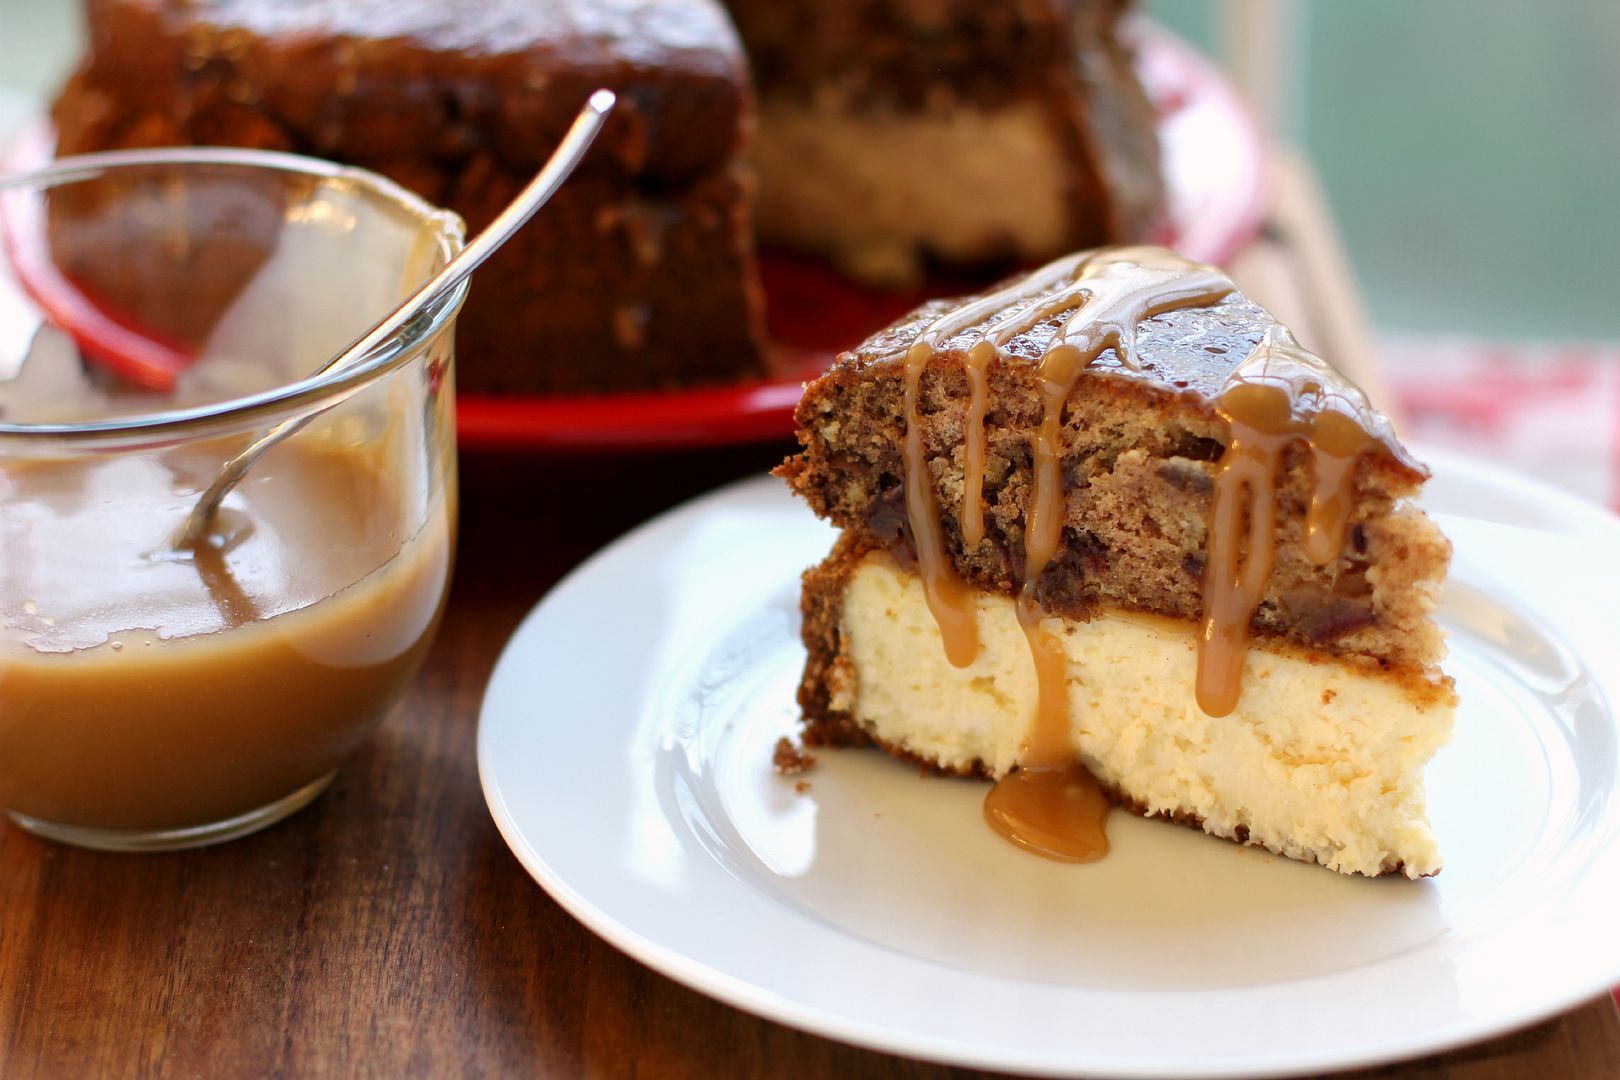
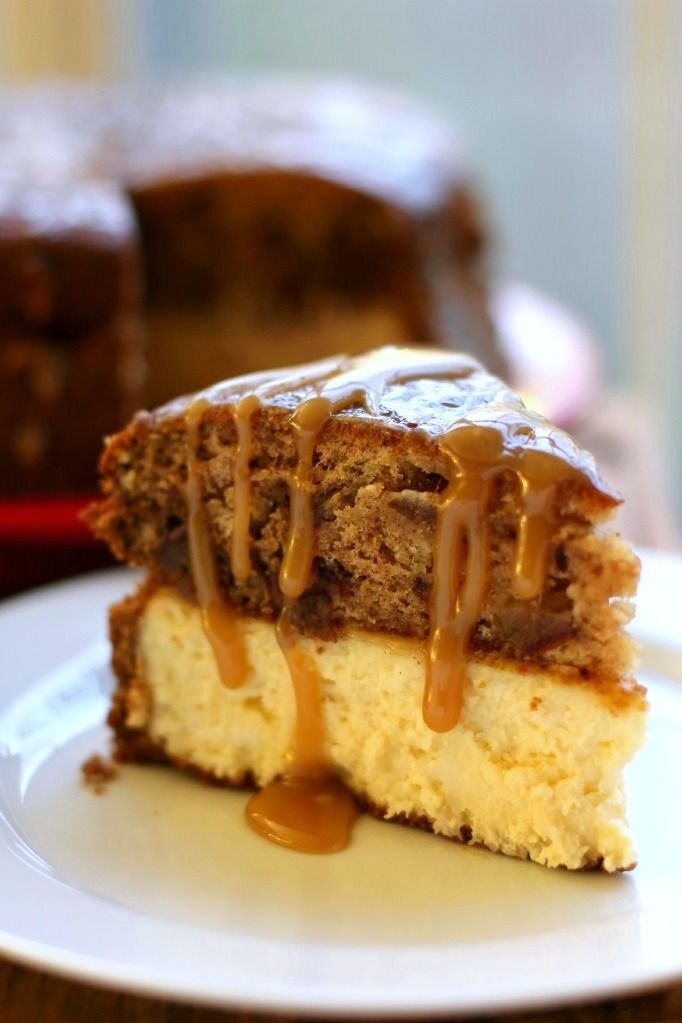
One of the flavor combinations that sounded particularly tempting to me was ginger and coconut. I decided to use this simple pair to create an indulgent Caramelized Banana Upside-Down Coconut Cake. Upside-down cakes are both simple to create and delicious. You’ll love this comforting, nostalgic dessert even more with a few modern twists: the bold zing of ginger in the caramelized banana topping, a moist coconut cake in the place of a regular yellow cake, and a big dollop of coconut whipped cream on top. I added a generous sprinkle of toasted coconut for extra texture and flavor. In short, it was insane. I can’t wait for you to taste this thing!

In the meantime, I’d love for you to join in the conversation: which of McCormick’s flavor combinations could you see yourself using? What are some ideas for recipes you want to create? Get inspired!

Caramelized Banana Upside-Down Coconut Cake With Coconut Whipped Cream


Recipe by: Willow Bird Baking, with coconut whipped cream adapted from Nutty Kitchen
Yield: 10 pieces

This thing is downright celestial. Upside-down cakes are easy to create, but come out so beautiful and delicious. This one uses a sweet, tender coconut cake in the place of a yellow cake, and adds the bold zing of ginger to the caramelized banana topping. Enjoy it with a cloud of cool coconut whipped cream (one of my new favorite things!) and some crunchy toasted coconut.

Topping Ingredients:
3/4 stick unsalted butter
3/4 cup packed light brown sugar
4 large just-ripe bananas, cut on a diagonal into 1/2-inch slices (you might want to have an extra banana or two on hand just in case your bananas are skinnier or something weird)
1 teaspoon McCormick ginger
1 teaspoon finely chopped McCormick crystallized ginger
pinch salt

Cake Ingredients:
1 cup all-purpose flour
3/4 cup sugar
1 1/2 teaspoons baking powder
1/2 teaspoon salt
1/4 cup vegetable oil
1/2 cup Thai Kitchen coconut milk
1 teaspoon McCormick vanilla
1 egg

Coconut Whipped Cream Ingredients:
2 cans Thai Kitchen coconut milk (refrigerated overnight)
3 tablespoons powdered sugar
1/2 teaspoon McCormick vanilla
flaked coconut for toasting and topping

Directions:
NOTE: This recipe is designed for a 10-inch cast iron skillet, but it can also be made in a 10-inch cake pan or a 12-inch cast iron skillet. To make it in a cake pan, prepare the topping in a separate saucepan first, add it to your cake pan, and then continue with the recipe as usual. If you make it in a 12-inch skillet, it’ll produce a thinner cake, may require an extra banana or two, and may take about 5 minutes less to bake. Because cast iron can vary, no matter what size you use, be sure to check the cake’s doneness early and often, starting around 20 minutes, with a toothpick inserted into various spots.

Toast coconut flakes: Preheat oven to 350 degrees F. Spread flakes out on baking sheet. Bake for a few minutes, stirring every minute or so, until the coconut is lightly browned (watch it like a hawk). Transfer to a plate to let cool.

Make cake: In a 10-inch skillet (see note above about using different pan sizes), melt the butter over medium-high heat. Stir in the brown sugar, ground ginger, crystallized ginger, and salt and simmer for 4 minutes (or until the mixture is bubbly and caramelized), whisking constantly. Be careful — hot sugar is no joke! After 4 minutes, remove the mixture from heat and add the bananas as close together as possible, fitting as many in as you can.

In a separate bowl, whisk together the flour, sugar, baking powder, and salt. Add the oil and coconut milk and whisk like a crazy person for 1 minute. Add the egg and vanilla and whisk it in well. Pour the batter over the banana mixture, evening it out with a spatula.

Bake 25-30 minutes or until it’s lightly brown on top and a toothpick inserted in various parts of the cake comes out with just a few moist crumbs. Let cool in the pan for exactly 5 minutes (any more and it will harden in the pan, and less and it might fall apart) before running a knife around the edge of it and carefully (use oven mitts! hold both sides of the skillet, holding the plate on with the heels of your hands! enlist a spotter! did I mention that hot sugar is no joke?) invert it onto a large serving platter.

Make coconut whipped cream: Using a spoon, remove the cold coconut solids from each can of coconut milk (save the coconut water for other uses). Place it in a chilled bowl with vanilla and powdered sugar. Whisk like the dickens with a chilled beater until it has a whipped cream-like consistency (this probably took over 10 minutes with my electric mixer, but it’s worth it). Serve cake warm with a big dollop of cold coconut whipped cream and a sprinkle of toasted coconut.

You don’t see many product reviews on Willow Bird Baking, because I’m choosy with how I share this space. My choosiness reflects my own ideals for Willow Bird in addition to my respect for the community we have here. When I get the opportunity to work with a company I genuinely love and use in my own kitchen, though, I’m always thrilled to share. McCormick is just such a company, and I’m excited to share their forecast of upcoming flavor trends.

Disclosure: McCormick sent me a Flavor Forecast Immersion Kit of ingredients, and compensated me for other ingredients and for my time and creative energy. I value my readers such that all opinions expressed on Willow Bird are always my own.

If you liked this post, please:
Subscribe to Willow Bird Baking
Follow Willow Bird Baking on Twitter
Follow Willow Bird Baking on Facebook
Give this post a thumbs up on StumbleUpon
Pin It


Shareother ways to share this post with friends

Milnot Cheesecake Cheesecake

The world lost a firecracker just a few days before Christmas. My Great Grandma Thelma passed away at 99 years old, but her spirit can’t be extinguished.

Grandma was as comfortable with a gun and a dog as she was in a dress and pearls. As if to match her personality, her hair remained a shocking shade of red right up until the last few years of her life, when soft white took over. The lines on her face deepened and multiplied over time, no doubt spurred on by belly laughs and smiles.

She was a home to those who needed a home, a laugh to those who needed a laugh, and a light to all of us.


Grandma Thelma through the years.

My mom, who was very close to her grandma and lived with her for awhile growing up, got to travel to Missouri to attend her funeral. Person after person stood up and reflected how Grandma had touched their lives. Mom says she couldn’t hold it together enough to talk about her Grandma then, but when she returned home, she sat down with my dad and began the task of capturing Nettie Thelma Logsden in words.

I can’t think of a better way to introduce you to this wonderful woman than to share Mom’s list with you. So without further ado, here are Life Lessons from Grandma Thelma. Some of them are funny, some of them are profound, some of them are downright suspect. But they’re all thoroughly Thelma.

1. Work hard. People are counting on you.

2. Turtles will always return to one spot. Best to paint your initials on their shells (hot pink paint will work) to identify them later.

3. Outhouses also look great painted hot pink!

4. Bacon grease, duck eggs, and bread soaked in grease make healthy dog food.

5. Spoons, Yahtzee, Rummy, and Skip Bo are great fun!

6. Cold beer and peanuts taste exceptionally good after mowing the lawn.

7. A bite of peanut butter will take the beer smell away (in case someone drives up)!

8. Empty your own “potty.”

9. A straw hat pulled way down will keep your hair from blowing in the wind while driving.

10. Empty bottles and doll heads are keepers!

11. Everything is a keeper!

12. Enjoy the silly things in life: Furbies, Billy Bass, Rockin’ Santas, et cetera.

13. Flour with weevils is fine; just sift them out and it’ll be good as new!

14. If the dog was good enough to tree something (even at 3 a.m.), it’s our duty to go shoot it!

15. If you are old enough to reach the pedal, you are old enough to drive.

16. If something is on sale, buy 10. Even if it’s bubble bath and you don’t have a bathroom. You’ll use it someday.

17. Under the bed is a great place to store all the Cokes you bought on sale.

18. Rock hunting is fun (especially hunting for shiny ones. Or round ones. Or flat ones. Or arrow heads. Well, pretty much ANY rock!)

19. Don’t do anything until the supper dishes are done. You’ll hate coming back to do them later.

20. Fishing, hunting, camping are all fun when done with family.

21. Annie Over is a wonderful game, but it’s hard to find a place to play!

22. Guitar, banjo, harmonica, and piano are all fun to play, and you can teach yourself!

23. Staying up late (even all night) is okay.

24. You can tie a string around a lizard’s tail and pin it to your shirt and it will wiggle. Beetles with strings tied to their leg are great fun, too. (Julie’s note: WHAT?! Really, Grandma?! Do not try this at home, y’all.)

25. You can drive better and faster if you hunch over the steering wheel. (Don’t forget the straw hat!)

26. The fish in Peggy’s lake like to eat chicken fat.

27. When you stir your gravy, put your whole body into it.

28. You don’t really ever need lunch.

29. Take people in if they need a place to stay.

30. Aunt Jaquie’s house is a great place to wash your hair, do laundry, or just hang out.

31. Certain plant leaves are good for making “frog tongues.”

32. Sleeping is better with a small pillow between your knees, a fan on, and a big swig of mineral “oral” before bed. (A True Confessions magazine helps, too.)

33. An electric skillet makes great fried chicken. (Or pork steaks!)

34. Waffles are great with white corn syrup and real butter.

35. Never talk bad about anyone. (Never THINK bad about anyone.)

36. Store-bought frozen cream pies are great!

37. Churn your own butter and drink the buttermilk.

38. Writing on the “tunnel” walls is fun.

39. A whole lot of kids can fit into one car on “$1.00 night” at Pine Hill Drive-In.

40. Grandkids are special!

41. Great grandkids are special!

42. Great, great, grandkids are special!

43. Milnot Cheesecake is very easy and tasty.

I may not agree with Grandma Thelma on every detail (I throw away my doll heads, personally. And OH MY GOSH, no live animals are pinned to clothing on my watch), but she’s struck plenty of truth here. She lived a bright, full, strong life, and treated every person who walked into that life with love and respect. I’m glad the world had her for 99 years.

One thing she was certainly right about is Milnot Cheesecake. It’s an old no-bake recipe named after Milnot, an evaporated milk substitute. The Milnot or evaporated milk whips into a whipped cream consistency. When combined with cream cheese and a package of lemon Jell-O gelatin, it creates a light, lemony cloud of mousse. Grandma Thelma used to wake up on occasion and declare, “I think I’ll make a Milnot cheesecake.”

But the title of this essay isn’t a mistake. The dessert pictured here isn’t a Milnot Cheesecake. It’s a Milnot Cheesecake Cheesecake.

Never content to leave well enough alone, I decided to stack a layer of Milnot Cheesecake on top of a layer of creamy, thick regular cheesecake. This double-layered dessert has a mixture of textures and a light, airy flavor that would make Grandma Thelma proud. The recipe might look a little fiddly — and true, it isn’t a dessert you can whip up in a few minutes — but it can be broken up over a few days into very manageable pieces.

In honor of Grandma Thelma, have a slice! (Then go finish your supper dishes. You aren’t going to want to come back to those later.)

Milnot Cheesecake Cheesecake


Recipe by: Willow Bird Baking, using an age-old recipe for Milnot Cheesecake found on Recipes for Laughter
Yield: serves 8-10

This recipe is a twist on the classic, no-bake Milnot Cheesecake. A layer of fluffy, delicious Milnot cheesecake sits like a delicate lemon cloud over a rich layer of traditional cheesecake. A cinnamon graham cracker crust encircles the whole shebang. See the note on scheduling below to break this recipe into a few manageable parts.

Cheesecake Ingredients:
3 (8 ounce) packages cream cheese, at room temperature
1 cup granulated sugar
1 1/2 tablespoons all-purpose flour
2 teaspoons vanilla extract
3 large eggs
2 heaping cups graham cracker crumbs (I use the cinnamon kind)
6 tablespoons butter

Milnot Cheesecake Topping Ingredients:
1/2 small package of lemon Jell-o gelatin mix (this will be 3 tablespoons and 1/4 teaspoon of the powder)
1/2 cup boiling water
8 ounces (1 package) of cream cheese, at room temperature
2 tablespoons and 2 teaspoons sugar
1/2 teaspoon vanilla
a few drops yellow food coloring, optional
1/2 of a 12-ounce can Milnot or evaporated milk, chilled (this will be about 3/4 cup)
crumbled graham cracker crumbs for decorationg

Directions:
Notes: Cheesecakes are simple and super customizable. New to cheesecake making? Watch my 6 minute Cheesecake Video Tutorial for visual assistance! This recipe can be divided up over several days. You can make the cheesecake one day and chill it overnight, make and add the Milnot cheesecake topping the next day, and serve on day 3!

Make the cheesecake: Preheat the oven to 350 degrees F. Lightly grease a springform cheesecake pan. Combine the cookie crumbs and melted butter in a small bowl. Toss with a fork to moisten all of the crumbs. Using a flat-sided glass, press into an even layer covering the bottom and sides of your cheesecake pan (you want it to be tall — try to get to about 2.5-3 inches high — and a little thicker than for your usual cheesecake; maybe 1/4 inch thick so it won’t crumble). Bake the crust for about 6 minutes and let it cool as you make your cheesecake filling.

In a large bowl, beat the cream cheese and sugar on medium-high speed until well blended. Beat in the flour. Add in the vanilla and beat until well incorporated, scraping down the sides of the bowl as needed. Beat in the eggs one at a time, scraping down the bowl between each addition. Pour the filling into your crust.

Bake until the top is lightly browned, puffed and cracked at the edges, and the center moves only very slightly when the pan is lightly shaken (about 40 minutes). Check while baking periodically and put a pie shield (or strips of foil) around the top of your pan to protect the crust edges if they’re getting too dark. Just don’t let the shield/foil touch the crust — it’s delicate and might crumble.

When you pull the cheesecake out, you can use a sharp knife to score a circle around the top of the cheesecake about an inch inside the crust so that as it cools and chills/sinks, it won’t pull the crust in too much. Don’t worry if the circle you cut isn’t pretty, because you won’t be able to see it in the finished product! Let cheesecake cool completely on a wire rack before chilling it in the fridge for at least 3 hours.

Make Milnot Cheesecake Topping: Dissolve Jell-o in boiling water and chill in the refrigerator until slightly thickened, about 25 minutes. Meanwhile, cream the cream cheese, sugar, food coloring, and vanilla in a large bowl. Beat the chilled Jell-o into the cream cheese mixture until completely combined and smooth.

In a large chilled bowl, whip the chilled Milnot with a chilled beater until it forms stiff peaks. Stir about 1/3 of the Milnot mixture into the cream cheese mixture to lighten it up. Then gently fold the rest of the whipped Milnot in until the mixture is uniform in color and completely combined. Pour Milnot filling evenly onto your cheesecake (you will use most of it but not quite all — pour the remainder into a separate dish and cover with graham cracker crumbs. Chill it to make a separate “individual” cheesecake dessert!). Garnish your cheesecake with graham cracker crumbs. Chill the cake for 8 hours. Keep refrigerated and serve chilled.

If you liked this post, please:
Subscribe to Willow Bird Baking
Follow Willow Bird Baking on Twitter
Follow Willow Bird Baking on Facebook
Give this post a thumbs up on StumbleUpon
Pin It


Shareother ways to share this post with friends

Willow Bird Baking’s Top 11 Recipes of 2011

It was only a couple of hours ago that I realized the big ball drops tonight. Mike and I have no plans besides watching more Star Trek: Deep Space Nine. I haven’t thought of a single resolution yet. You could say I’m unprepared.

But actually, I am ready. I may not have all the trappings quite prepared, but I’m more than ready to send 2011 off with a kiss and a wave. There were lovely parts of this year — my time with my students, my trip to San Francisco, and most of all, my reunion with Mike. But there were also many challenges. I’m thankful for where I am, but so ready to charge forward in 2012 and live a life I believe in. How about you? What are your resolutions, goals, or plans?

To conclude a wonderful year on Willow Bird Baking — a year in which I have so appreciated your every visit and every comment to these pages — here are the top 11 recipes from ’11. Thanks for a fantastic year, y’all!

11. Strawberry Cheesecake Stuffed Amaretto Cake Pops (on Pretzel Sticks!)
10. One-Skillet Gooey Pumpkin Cookie Cake
9. Birthday Cake Cheesecake
8. Deep Fried Cake Batter Cookie Dough


7. (Freshly Picked!) Strawberry Cream Pie
6. Cake Batter Cookie Dough Truffles
5. Salted Caramel Chocolate Trifle
4. Easy Sopapilla Pumpkin Cheesecake Bars


3. Pumpkin Spice Pull-Apart Bread with Butter Rum Glaze
2. Red Velvet Cheesecake

And the top Willow Bird Baking recipe of 2011 is . . .

1. Three Safe-to-Eat Cookie Doughs: Chocolate Chip, Sugar, and Cake Batter!

Happy New Year!

If you liked this post, please:
Subscribe to Willow Bird Baking
Follow Willow Bird Baking on Twitter
Follow Willow Bird Baking on Facebook
Give this post a thumbs up on StumbleUpon
Pin It


ShareOther ways to share this post with friends!

Cranberry Orange Pecan Cake (vegan)

I’m sitting in my living room like a lump, listening to a Brazilian rock band and watching Mike exercise (I’m pretty sure I’m getting healthier by proxy). Byrd is snuggled beside me, a tiny fellow lump. I’m about to grade papers (I promise), but the sum total of my work today has been coining a new nickname for Byrd: Sweet Potato. It’s a cross between sweetheart and couch potato. Get it?

So it’s been a lazy day. I ate oatmeal on toast and then some sausages, caramelized onions, and sauerkraut for dinner. Mike and I discussed Jean Luc Picard. We finished watching Miracle on 34th Street. Byrd chewed on her toy for awhile. That’s about the sum total of our productivity.

It’s about time for some relaxation, though. I like to say that teachers don’t really get a “weekend” for 10 months out of the year; we’re hard at work or on call 24/7. Work and home start to blend together — you lesson plan at school and grade papers at home or vice versa, answering student and parent queries all the while. You squeeze in the other bits and pieces of your life wherever they fit (and sometimes leave them by the wayside altogether — I won’t mention how long my carpet sometimes goes unvacuumed).

Also, I work at a project based school, which means students learn through authentic application projects. I’m wholeheartedly invested in this model, but it does mean that I’m always knee-deep in projects to grade.

I would never complain — I have the best job in the world (did I tell you about the lamb that was at school last week? Did I mention the Winter Wonderland where students caroled and drank hot chocolate? Did I tell you about how my students are actually excited to receive new projects?) But I definitely appreciate a break now and then.

This break has been appreciated to the fullest. Honestly, this is my first day of lounging around in an otherwise caffeinated week. I’ve been getting housework done and prepping for the holidays. And Monday, I attended a baked goods swap (my first ever, if you can believe it) with the Charlotte Food Bloggers.

The Charlotte Food Bloggers are an incredibly varied group of people. We have mommy bloggers, vegan bloggers, healthy living bloggers, restaurant reviewers, and straight up food bloggers. I decided I wanted to make a dessert everyone could enjoy and that meant (gulp) baking vegan.

Vegan baking may conjure up ideas of dry or oily frankendesserts, but it really shouldn’t. This cake, for instance, was as delicious as any non-vegan cake I’ve ever tasted. It was, if I do say so myself (and I did already, on Willow Bird Baking’s Facebook page), pretty slammin’! It even passed the Mike test, and he’s quite the carnivore.

The festive combination of orange zest and cranberries brightened up the moist cake, which was generously slathered with some dairy-free “cream cheese” frosting. Whether you’re vegan or not, give this one a try.


fun with the charlotte food bloggers (instagram courtesy of taylor mathis)

Vegan Cranberry Orange Pecan Cake


Recipe by: Adapted from the veganized version by The Tolerant Vegan, originally from Midwest Living
Yield: 9 servings

This cake is fantastic! It’s a moist, delicious “butter” cake full of festive cranberries, orange zest, and toasted pecans. The whole thing is slathered with dairy-free cream cheese frosting that, unlike some other vegan frostings I’ve tried, is a great consistency for spreading. Whether you’re a vegan or not, you’ll love every bite of this cake.

Cake Ingredients:
3/8 cup Earth Balance Natural Buttery Spread
3/4 cups sugar
1/4 cup unsweetened applesauce
5/8 cup vanilla almond milk
1 teaspoon vanilla extract
1 1/4 teaspoon baking powder
1/2 teaspoon baking soda
1/8 teaspoon sea salt
1 1/4 cups all-purpose flour
1 1/2 teaspoons distilled white vinegar
1 cup cranberries, fresh or frozen, chopped
1/4 cup toasted pecans, chopped (plus more for sprinkling)
1 tablespoon orange zest

Frosting Ingredients:
1 cup confectioners’ sugar
2 tablespoons plus 2 teaspoons dairy-free cream cheese, softened (I used Trader Joe’s This is Not a Tub of Cream Cheese)
2 tablespoons plus 2 teaspoons Earth Balance Natural Buttery Spread, softened
1/4 teaspoon vanilla extract

Directions:
Preheat your oven to 375 degrees Fahrenheit. Prepare an 8-inch square baking pan by greasing it with Earth Balance and flouring it. Place a parchment paper square in the bottom, and grease and flour the paper as well. (Note: You can double this recipe and make it in a 9 x 13-inch pan).

In a large bowl, cream together the Earth Balance and sugar for 2-3 minutes until fluffy. Mix in the applesauce, almond milk, and vanilla extract. In a separate bowl, whisk together the baking powder, baking soda, sea salt and flour. Add the dry ingredients to the wet ingredients and mix until fully combined.

Mix in the vinegar. Fold in the cranberries, pecans, and orange zest. Pour the batter into your prepared pan and bake for 25-30 minutes, or until a toothpick inserted in the center of the cake comes out with just a few moist crumbs. Allow the cake to cool completely before you frost it.

To make the frosting, place confectioners’ sugar, dairy-free cream cheese, Earth Balance, and vanilla extract in a bowl and mix until combined and fluffy. Spread the frosting on the cake, sprinkle with toasted pecans, and serve.

P.S. I just learned about orange pomanders this year and have enjoyed making them. Just poke some whole cloves into a few oranges. You can make any design you like. They smell lovely and are a fun little Christmas craft.

P.S. 2 – See Taylor’s visual recap of the CFB baked goods swap here. Lots of pretty food!

If you liked this post, please:
Subscribe to Willow Bird Baking
Follow Willow Bird Baking on Twitter
Follow Willow Bird Baking on Facebook
Give this post a thumbs up on StumbleUpon
Pin It


Shareother ways to share this post with friends

Sticky Toffee Pudding Cheesecake

Listen, this entire post is about turn signals. Like, the whole post (with the exception of some cheesecakey bits). I’m just warning you in case you’re not in a turn signal sort of mood.

(You are in a Sticky Toffee Pudding Cheesecake sort of mood though, right? Good.)


sticky toffee love.

I am not a violent person in general, but there is nothing that makes me wish I had a rocket launcher stashed in my glove compartment more than people who don’t use turn signals. Turn signals are included on your vehicle to let other people know where you’re headed so they don’t plow into you and die. They’re, like, important*.

(Am I ruining the serene vibe we had going on here with all the pretty pastels and birdies and such? I’m probably totally harshing the mellow with my latent road rage. Sorry.)


Just think of cheesecake.

Actually, I don’t care if you ignore your turn signal sometimes. I’m not unreasonable. For instance:

Are you driving down a deserted road in the middle of the frigid Nebraska night, with no one but a few chilly cows to watch you with disdain as you turn left with no prior warning? It’s cool. No need to signal. The bovine haters will learn to accept your rebellious agrarian road rules.

Are you one of those bodacious** ice road truckers whose existence I honestly still kind of question? You crazy mythological creature, you! Forget those turn signals. No one needs to be notified that you’re about to veer in a different direction across the frozen tundra.


cheesecakes are also exempt from signaling.

Are you Abraham Lincoln? Abe, you were one honest, tall, admirable dude. I don’t think anyone would hold it against you if you didn’t signal before you turned your horse and buggy. Plus, you’re (sadly) deceased. Dead people do not need to use turn signals.

If you’re not a Nebraskan farmer, an ice road trucker, Abraham Lincoln, or dead, however, you’re going to have to suck it up and signal***.

And if you’re one of the billions of Charlotteans who seem to think it’s not important to use your turn signal when switching into the middle lane of a busy multilane highway in the middle of the night, well. The Charlotte police department has granted me the right to revoke your license (okay, no they haven’t.) But I think it’s just kind of implied that I’m allowed to do so.


the one with the cheesecake makes the rules.

Well. After all that road rage, I think we need something comforting. How about something so comforting you want to bathe in it? Something so comforting you want to wear it around like a sticky toffee snuggie? How about a thick, sloppy slice of Sticky Toffee Pudding Cheesecake?

Just to address the elephant in the room: yes, the cake is about as ugly as sin (or as ugly as not using one’s turn signal? Sorry, I’ll stop.) The crust crumbled down to just the cheesecake height. The toffee pudding is puckery on top. The whole thing is decidedly brown. Please don’t be deterred, though. Firstly, you can dress it up with a drizzle of toffee sauce and some pretty flatware. Secondly, it’s one of the best things I’ve ever tasted.

It’s not surprising that it’s good: it’s buttery toffee sauce on top of smooshy, date-filled pudding (in the British sense, y’all, not the Jell-O sense) on top of a creamy cheesecake on top of a gingersnap and graham cracker crust. It did surprise me, though, how good it was. And really, how freeing. Knowing that your goal is a homey, warm, comforting dessert instead of a beautiful one can make the whole process feel more forgiving.

Much more forgiving than I am with regards to your driving practices, for sure.


u-g-l-y, this cake ain’t got no alibi — but it’s nothing a little toffee sauce can’t fix.

*Full disclosure: I’m sure that at some point, I have neglected to use a turn signal. You guys are free to call me the crap out if you ever see it happening. This is probably safe to say since very few of you know what sort of car I drive. Heh.

**In writing this post, I came across this Yahoo! Answers post about how to talk about Andrew Jackson without using the word “badass,” and I admit I laughed for at least a full minute. I guess I can’t talk, because I was searching for a way to describe ice road truckers without using that word.

***I still love you even if you don’t use your turn signal. Please still love me even though I just wrote an entire post admonishing you.

Time for cake!

Sticky Toffee Pudding Cheesecake


Recipe by: Willow Bird Baking, using Food Network’s pudding recipe
Yield: 10-12 servings

There are no words for how delicious this dessert is. Buttery toffee sauce cascades over smooshy, date-filled sticky toffee pudding on top of a creamy cheesecake. The recipe can be made over several days and made in advance, making it convenient in addition to delectable. I served slices warmed for 30-40 seconds in the microwave and with a drizzle of extra toffee sauce. A scoop of ice cream or a dollop of whipped cream would be a lovely addition.

Cheesecake Ingredients:
3 (8 ounce) packages cream cheese, at room temperature
1 cup granulated sugar
1½ tablespoons all-purpose flour
2 teaspoons vanilla extract
3 large eggs
2 heaping cups cookie crumbs (I used a 50/50 mixture of graham cracker and gingersnap crumbs)
6 tablespoons butter

Sticky Toffee Pudding Ingredients:
1 cup plus 1 tablespoon all-purpose flour
1 teaspoon baking powder
3/4 cup pitted dates, finely chopped (Oh Nuts! provided me with these)
1 1/4 cups boiling water
1 teaspoon baking soda
1/4 cup butter, room temperature
3/4 cup granulated sugar
1 large egg, lightly beaten
1 teaspoon vanilla extract

Toffee Sauce Ingredients:
1/2 cup butter
1/2 cup heavy cream
1 cup packed light brown sugar

Directions:
Notes: Cheesecakes are simple and super customizable. New to cheesecake making? Watch my 6 minute Cheesecake Video Tutorial for visual assistance! This recipe can be divided up over several days — you can make and refrigerate both the cheesecake and pudding in advance. Simply make the toffee sauce and assemble the day you’re serving the cake.

Make the cheesecake: Preheat the oven to 350 degrees F. Lightly grease a springform cheesecake pan. Combine the cookie crumbs and melted butter in a small bowl. Toss with a fork to moisten all of the crumbs. Using a flat-sided glass, press into a thin layer covering the bottom and sides (you want it to be tall — try to get to about 2.5-3 inches high and not too thick in any one spot) of your cheesecake pan. Bake the crust for about 6 minutes and let it cool as you make your cheesecake filling.

In a large bowl, beat the cream cheese and sugar on medium-high speed until well blended. Beat in the flour. Add in the vanilla and beat until well incorporated, scraping down the sides of the bowl as needed. Beat in the eggs one at a time, scraping down the bowl between each addition. Pour the filling into your crust.

Bake until the top is lightly browned, puffed and cracked at the edges, and the center moves only very slightly when the pan is lightly shaken (about 40 minutes). Check while baking periodically and put a pie shield (or strips of foil) around the top of your pan to protect the crust edges if they’re getting too dark. Just don’t let the shield/foil touch the crust — it’s delicate and might crumble. Let cheesecake cool before chilling it in the fridge for at least 3 hours. (My crust kind of crumbled on top as the cheesecake cooled and pulled it inward, but don’t fret if this happens — everything will still be delicious! I just swept away the crumblies with a pastry brush.)

Make Sticky Toffee Pudding: In the meantime, grease a 9-inch round cake pan. Place a parchment paper round in it to line the bottom, and grease the paper as well. You don’t want your pudding stuck in your pan!

Sift the flour and baking powder onto a sheet of waxed paper (I love doing this with dry ingredients, because then the paper becomes a funnel for easy transport of your dry ingredients and you aren’t using an extra bowl). In a separate small bowl, gently mix the dates, boiling water, baking soda. Set this aside.

In a large bowl, cream the butter and sugar together until light and fluffy (2-3 minutes). Add the egg and vanilla and beat to combine. Gradually mix in the flour mixture, scraping down the sides of the bowl as needed. Fold in (I did a little folding and a little stirring, since it was quite soupy, but just be gentle with it) the date mixture with a spatula. Pour your batter into your prepared pan and bake until the pudding is set up and firm, about 35 minutes (jiggle the pan and watch the middle). Let the pudding cool completely on a wire rack before inverting it onto a wax paper lined plate and popping it in the freezer to firm up for easy handling (or leave it in the fridge overnight).

Make the Toffee Sauce: In a small saucepan, combine the butter, heavy cream and brown sugar. Bring this to a boil, whisking constantly. Boil gently for about 8 minutes over medium low heat, or until the mixture is thickened.

Assemble the cake: Preheat the broiler. Spoon about 1/3 cup of toffee sauce onto the surface of your cheesecake to serve as a “glue” and gently place your sticky toffee pudding layer on top, pressing to adhere. Top this layer with about 1/3 cup of the toffee sauce and spread this around evenly on top. Place the cake under the broiler until the topping is bubbly, about 1 minute (keep a close watch! I rotated mine carefully every few seconds for even bubbling). Carefully remove the springform pan and using a sturdy spatula or two, place cheesecake on serving platter (if you’re nervous, just remove the sides of the springform pan and serve it straight from the base — no worries). Serve slices with extra toffee sauce and whipped cream or ice cream.

P.S. Oh Nuts! sent me California Medjool Dates to try free of charge. My opinions are always my own and always thoughtfully prepared with consideration for my readers — and I loved the dates! It was my first date experience and now I’m hooked.

If you liked this post, please:
Subscribe to Willow Bird Baking
Follow Willow Bird Baking on Twitter
Follow Willow Bird Baking on Facebook
Give this post a thumbs up on StumbleUpon
Pin It


ShareOther ways to share this post with friends!

1 24 25 26 27 28 35