Coffee Mousse Filled Double Chocolate Chunk Cookie Sandwiches

Last weekend I spent 48 hours with 14 of my seventh graders. At camp. Doing campy things (pun intended).

That probably sounds like a unique form of teacher-torture, but it was actually a fantastic experience, and one I’m planning on telling you all about. For now, though, I just want to tell you about highs and lows.

Highs and lows is a game we played while sitting in one of those kumbaya campfire circles you may remember from the summers of your childhood. Each student listed a high from the day — some accomplishment or moment of frolicking they particularly enjoyed — and a low — something they would change if they had fancy superhero rewind powers.

This may sound strange, but listening to them recite their lows was encouraging. If you’ve ever been close to a seventh grader for a prolonged period of time, you know that they can lapse into sarcasm and negativity about as quick as you can say, “Do your homework.” At other times, though, they can be pretty special little people to be around.

I heard a few people say, “I can’t think of any lows.” A couple commented on minor annoyances like bugs or pollen. One was sad his team didn’t get to float their raft because of the rain, but even that was qualified with, “but I really enjoyed the process of building it anyway.” What cool kids.

Their highs were even better. They were proud of how everyone had worked as a team, enthusiastic about spending time with their classmates, excited that one team’s makeshift raft had made it to the dock and back without disintegrating. All in all, the circle was a sweet, s’more-punctuated time — even without joining hands or braiding daisies into each other’s hair (though that would’ve been fun).

I’m a thoroughly reflective person — a trait happily amplified by my profession — and there’s been quite a lot to digest in my life beyond the campgrounds lately. Perhaps that’s why my thoughts turned today toward the highs and lows game — mountains and valleys, waterfalls and mud puddles. I’ve been trying to revisit the campfire in my mind to catalog and categorize recent events.

My lowest low this week was disconnecting from a good friend. I’ve been seeing a boy for awhile now who was special to me during my own middle school years, but I realized recently that things weren’t going to pan out. I’m trying to be all Joy-the-Baker about this and say, “Oh, boys come and go like brownie recipes,” but I think you must need curly hair and adorable freckles to pull that off, ’cause it’s not working for me. I guess I’ll stick to unattractive moping.

There are other, more mundane lows. My basil plant is looking droopy. The weather’s been rainy and chilled. A cloud bank today on the horizon reminded me of unreachable mountains, somber moments.

But:

-Today my sweet friend and coworker Ashley brought me a happy hippo.
-I just bought two of the sweetest sundresses ever from Target.
-I literally own at least 5 jars of On the Border salsa at this very moment.
-My family is healthy.
-I’m watching a bit of Kings of Pastry each evening.
-I found out a local cupcake truck is selling a version of one of my cupcake recipes, which they’ve named after the blog.
-Flippin’ SAVEUR listed Willow Bird Baking as one of the “50 More Food Blogs You Should Be Reading.”

Such soaring highs! I’m so grateful for those.

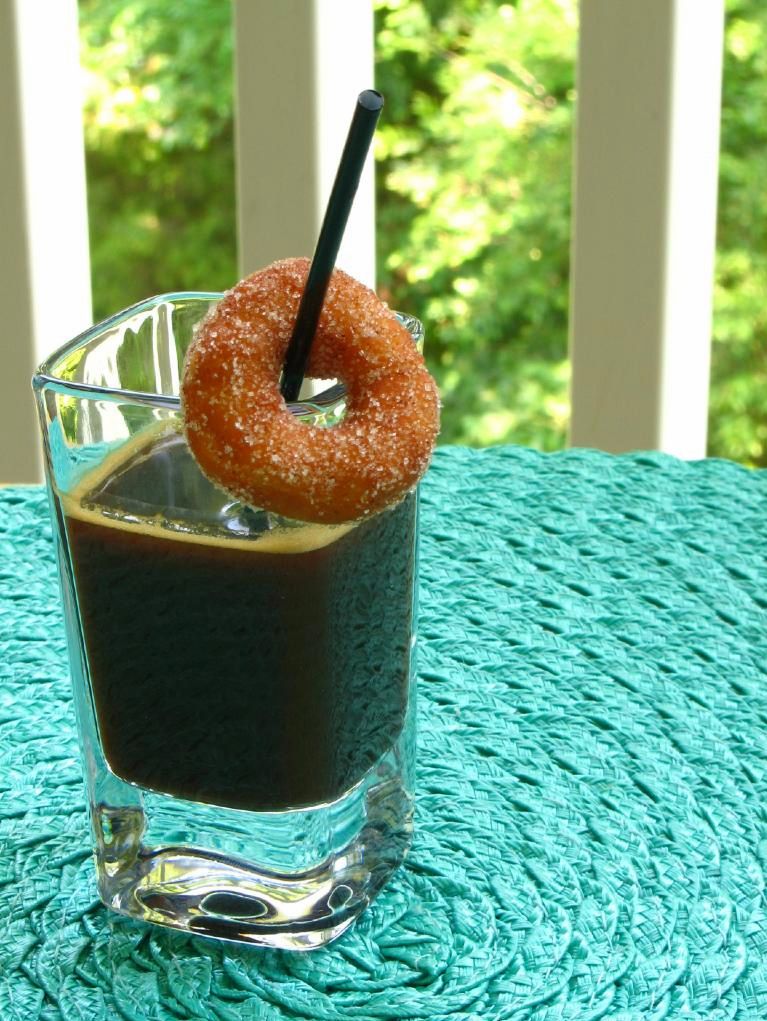
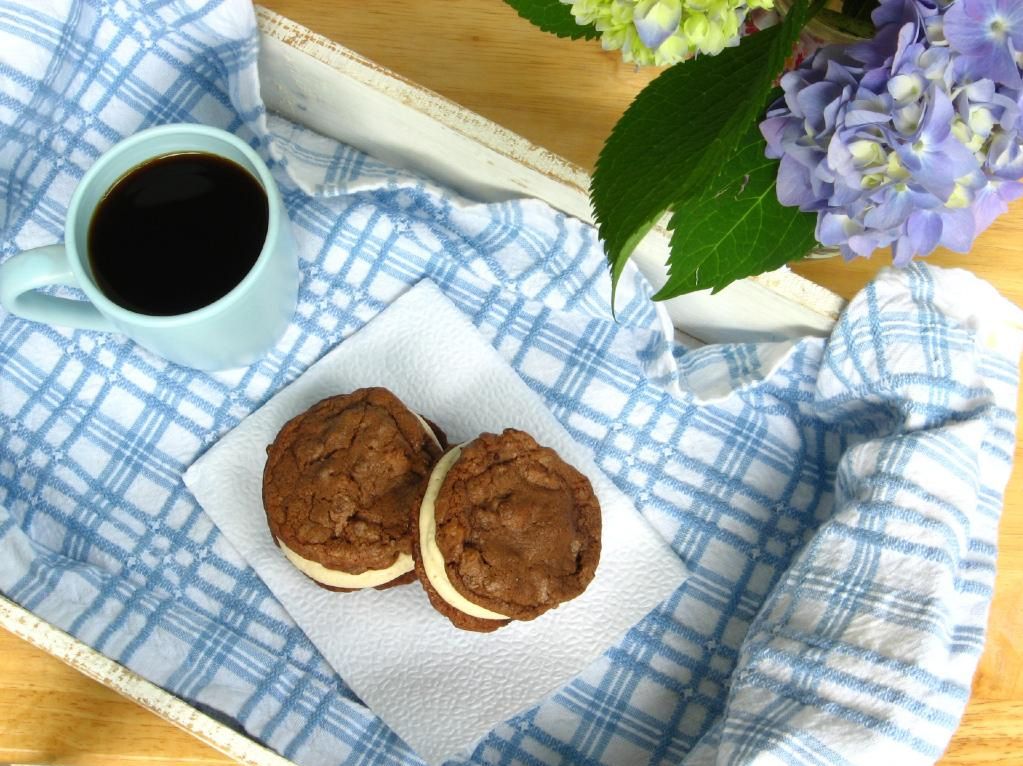
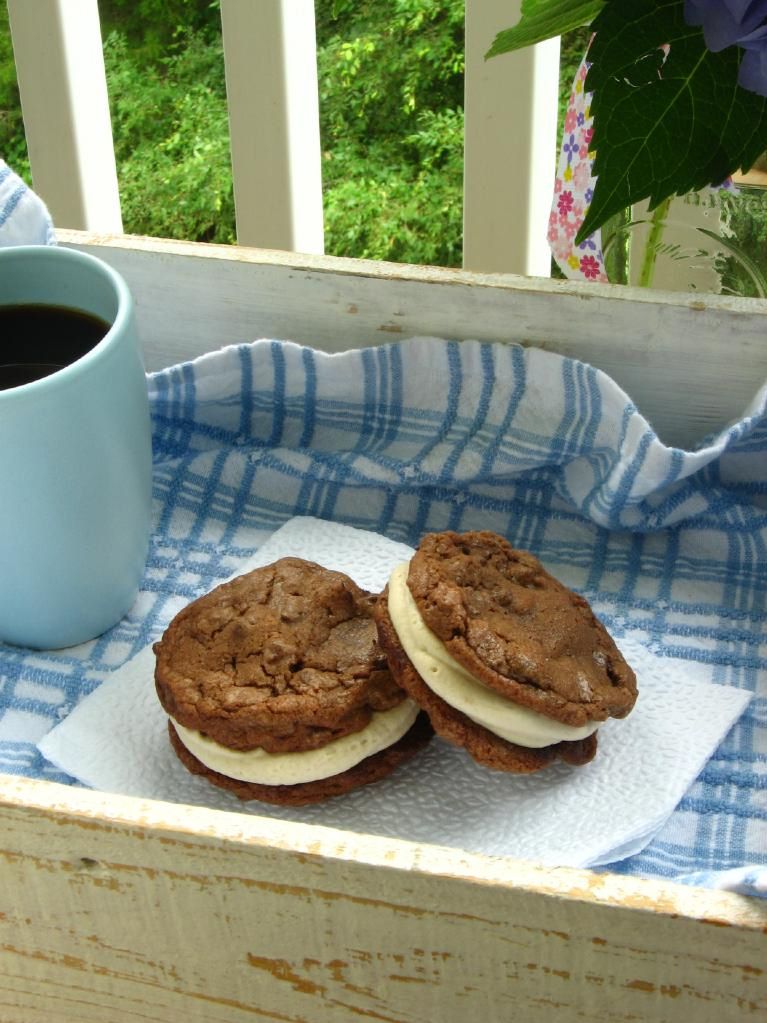
Another sorely needed high came in the form of these sweet little sandwich cookies. Driving home with Ashley, who bravely co-chaperoned the camping trip, I started brainstorming ways to use the coffee mousse I’m now enamored with. We thought of a gorgeous roulade, filled cupcakes, and lots of other things, but then Ashley mentioned how she loved to invent new cookie recipes. Cookies are so simple, so quick, so satisfying — everything I needed after a rough and tumble couple of days.


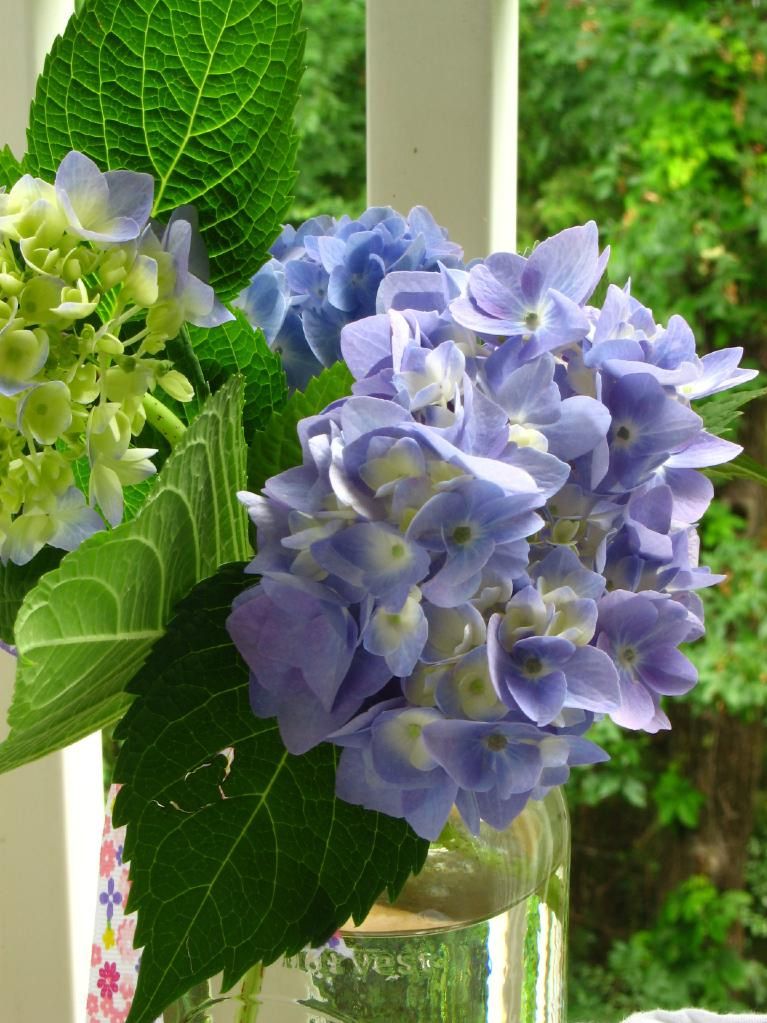
Mom’s hydrangea bushes are blooming — another high!

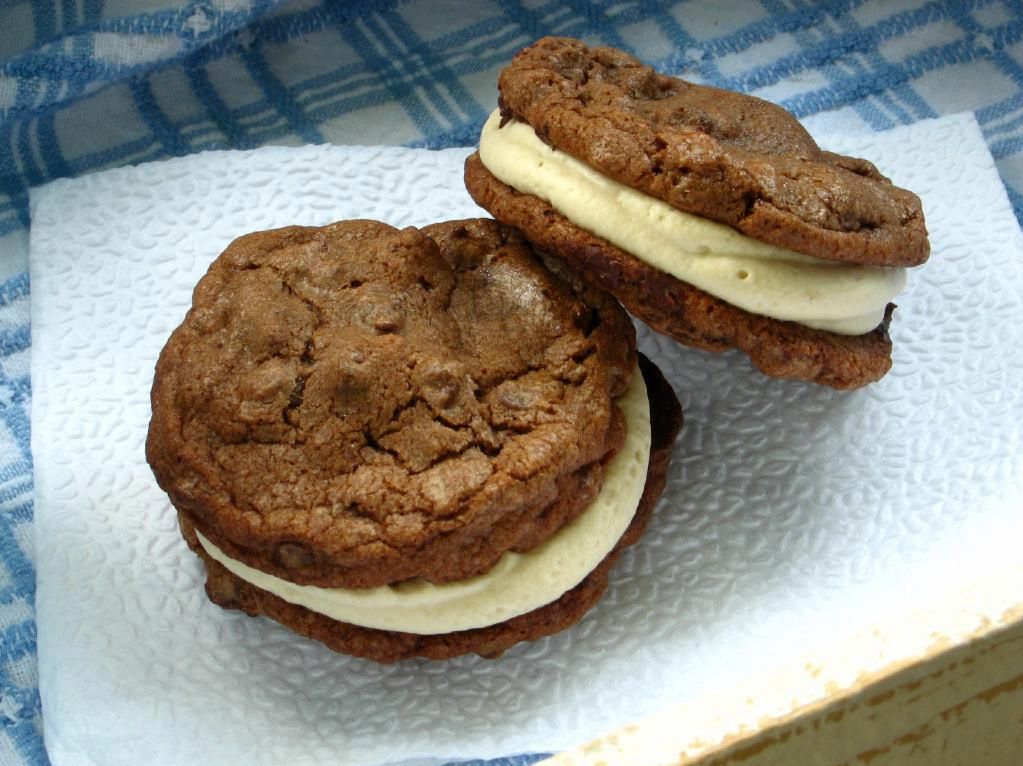
They’re also delectable, particularly when the words double chocolate are involved. These little sandwiches turned out rich and indulgent, with the perfect balance of flavors (sweet chocolate combined with the bitter, matte flavor of coffee) and textures (voluminous cream between chunky cookies).

For me, there’s also something simple and childlike about the experience of eating a cookie sandwich. It reminds me of pulling an Oreo or an Oatmeal Cream Pie like a treasure from a Care Bears lunchbox. And if that sort of memory isn’t a high, I don’t know what is.

What are your highs and lows lately?

Coffee Mousse Filled Double Chocolate Chunk Cookie Sandwiches


Recipe by: Cookies adapted from Cathy Lowe, mousse adapted from coffee pastry cream by Rebecca Franklin
Yield: About 48 cookies or 24 sandwiches

Cookie Ingredients:
2 1/4 cups flour
1 teaspoon salt
1 teaspoon baking soda
2 sticks butter, softened
1 cup granulated sugar
1 cup packed brown sugar
2 large eggs, beaten
1 tablespoon vanilla
1/2 cup unsweetened cocoa
1 cup semisweet chocolate chips
1 cup bitterweet chocolate chips (I love Ghirardelli)
1 cup chopped pecans (optional)

Coffee Mousse Ingredients:
1 ¼ cups whole milk
2 teaspoons instant coffee granules
3 egg yolks
5 tablespoons granulated sugar
1 tablespoon all-purpose flour
2 tablespoons plus 2 teaspoons cornstarch
1 teaspoon pure vanilla extract
1 cup whipping cream
1 teaspoon gelatin

Directions:
Make the cookies: Preheat oven to 375 degrees. Whisk together flour, salt, and baking soda in a medium bowl. In a large bowl, cream the butters and both sugars together for a couple of minutes until fluffy. Add egg, vanilla and cocoa and mix. Gradually add flour mixture and mix until combined. Add chocolate chips and pecans, stirring until they’re evenly distributed.

Drop the dough by tablespoonfuls onto a greased baking sheet or one covered with parchment paper or a silicone baking mat. Bake for 8-10 minutes and cool on the pan for a few minutes before transferring to a cooling rack.

Make the mousse: While cookies are baking and cooling, make the mousse. Whisk together the egg yolks, sugar, flour, and cornstarch until the mixture is completely smooth and set aside. Place the milk in a saucepan and sprinkle gelatin over it. Let it soften for 2 minutes before adding the coffee granules and setting the saucepan over low heat. Heat until it’s just hot enough to steam, stirring the gelatin in to dissolve.

Once the milk is steaming, add half of it, whisking constantly, to the egg mixture to temper the eggs (this ensures they won’t cook when you add them to the hot mixture). Add the milk and eggs back into the hot milk and continue stirring, and heat it for 1-2 minutes, until the custard reaches 170 F on a digital thermometer and is very thick. Remove from the heat, stir in the vanilla extract, and set the pan in a bowl of ice water, stirring every few minutes. Cool completely in this manner.

In the meantime, whip the cream in a chilled bowl until it holds stiff peaks. When the coffee mixture is cool, mix about 1/3 of the cream into it to loosen and lighten it. Then fold the rest of the cream in gently. Chill the mousse for at least 30 minutes before using.

Assemble the sandwiches: Turn half of the cookies upside down on the cooling rack. Pipe or dollop a good amount of cream onto these cookies and place the other cookies on top of them. Serve immediately or refrigerate in an airtight container.

P.S. One of my high school cooking students had the idea to try this coffee mousse with bacon and it was fantastic! Have I mentioned that I love my students?

If you liked this post, please:
Subscribe to Willow Bird Baking
Follow Willow Bird Baking on Twitter
Follow Willow Bird Baking on Facebook
Give this post a thumbs up on StumbleUpon


ShareOther ways to share this post with friends!

Coffee Mousse Filled Doughnuts

Remember these?

What you may not remember (because, um, I didn’t tell you) is that the lovely Maple Bacon Doughnuts aren’t the only avant garde doughnuts in town. (Can you describe a doughnut as avant garde? I call poetic license.)

Introducing Coffee Mousse Filled Doughnuts!

Much like their Maple Bacon cousins, these dreamboats are capitalizing on a quintessential breakfast pairing. The puffy, fried orbs are filled with a sweet coffee mousse and topped with either melted chocolate or rolled in powdered sugar. Serve them alone, or combine them with Maple Bacon doughnuts for a breakfast extravaganza!

What’s your favorite doughnut filling?

Coffee Mousse Filled Doughnuts


Recipe by: Doughnuts adapted from Cherry Tea Cakes, mousse adapted from coffee pastry cream by Rebecca Franklin
Yield: about 12 3-inch doughnuts

Doughnut Ingredients:
1 0.25-ounce package yeast
2 tablespoons hot water, roughly 110 degrees in temperature
3/4 cups milk, scalded (heated to a slight simmer-not a boil) and cooled
1/4 cup sugar
1/2 teaspoon kosher salt
1 egg
2 tablespoons and 2 teaspoons shortening
2 1/2 cups all-purpose flour
melted chocolate and/or powdered sugar for topping
vegetable oil for frying

Coffee Mousse Filling Ingredients:
1 ¼ cups whole milk
2 teaspoons instant coffee granules
3 egg yolks
5 tablespoons granulated sugar
1 tablespoon all-purpose flour
2 tablespoons plus 2 teaspoons cornstarch
1 teaspoon pure vanilla extract
1 cup whipping cream
1 teaspoon gelatin

Directions: Make the doughnut dough: Dissolve the yeast in warm water in the bowl of your stand mixer, and then let it sit for about 5 minutes. The yeast should foam to show that it’s active. Beat in milk, sugar, salt, eggs, shortening, and 1 cup flour (scraping down bowl when needed). Beat on medium speed for 2 minutes to fully combine. Mix in remaining flour completely. Cover this dough and let it rise in a draft-free place (I warm my oven for a few seconds on 200 degrees just to get the chill out — make sure it’s not hot! — and then put my dough in there to rise) until doubled, about 50-60 minutes.

Make the Coffee Mousse: While the dough is rising, whisk together the egg yolks, sugar, flour, and cornstarch until the mixture is completely smooth and set aside. Place the milk in a saucepan and sprinkle gelatin over it. Let it soften for 2 minutes before adding the coffee granules and setting the saucepan over low heat. Heat until it’s just hot enough to steam, stirring the gelatin in to dissolve.

Once the milk is steaming, add half of it, whisking constantly, to the egg mixture to temper the eggs (this ensures they won’t cook when you add them to the hot mixture). Add the milk and eggs back into the hot milk and continue stirring, and heat it for 1-2 minutes, until the custard reaches 170 F on a digital thermometer and is very thick. Remove from the heat, stir in the vanilla extract, and set the pan in a bowl of ice water, stirring every few minutes. Cool completely in this manner.

In the meantime, whip the cream in a chilled bowl until it holds stiff peaks. When the coffee mixture is cool, mix about 1/3 of the cream into it.

Make your doughnuts: Flour a surface well and turn your doughnut dough out onto it, flouring the dough as well. Gently roll the dough out to 1/2-inch thick and cut into solid rounds with a 3-inch cooking cutter. Place each round on a baking sheet and let these rise until doubled, about 30-45 minutes. About 25 minutes into their rise time, start heating your oil in a heavy, deep stock pot to 350 degrees F on a candy/fry thermometer.

Fry your doughnuts: Gently lower 2-3 doughnuts at a time into hot oil with a slotted spoon. Fry about 1 minute on each side or until golden brown. Remove to a paper towel lined plate to drain.

Assemble doughnuts: Melt some chocolate and/or prepare a plate of powdered sugar to coat doughnuts. Use a chopstick or butter knife to poke into each doughnut and “sweep” gently to create a pocket. Pipe mousse into each doughnut using a piping bag. Then dip them in the chocolate or roll in the powdered sugar. Best eaten the same day.

If you liked this post, please:
Subscribe to Willow Bird Baking
Follow Willow Bird Baking on Twitter
Follow Willow Bird Baking on Facebook
Give this post a thumbs up on StumbleUpon


ShareOther ways to share this post with friends!

Strawberry Cheesecake Stuffed Amaretto Cake Pops (on Pretzel Sticks!)

Dear Rebecca Black,

For the record, I think you’re adorable and I want you to be in my 7th grade class. We talked about you a little bit when we were all having fun fun fun fun with your song, and about how mean some folks on the interwebz can be.

My students realized that you were their age (just 13!), and we all felt like if it’d been one of them taking the brunt of jokes and criticism, we’d be sad. So we want you to know that we’re sorry about the meanies, and we hope you’re enjoying all the good-spirited parodies of your song as much as we are.

Oh, but my 7th grade students told me about the “censored” parody of your song — don’t enjoy that one. Don’t even watch it. Cover your ears, young lady! I’ll redirect you to the Sunday school parody instead.

Anyway, your song has brightened up lots of my weekends! Sometimes I blast it at the beginning of class on Fridays and it never fails to produce smiles. And yeah, we break it down — everyone needs a 5 minute dance party now and then.

And you know what? I get it, girl. You so excited about Friday that you’re dropping verbs and everything else, and I want you to know that I understand.

In fact, I’m a little obsessed with your song right now. It just describes so perfectly how I feel about so many things. I’m going out to eat? I-I-I so excited! It’s only 4 weeks until summer vacation? I-I-I so excited! I’m making flippin’ Strawberry Cheesecake Stuffed Amaretto Cake Pops on flippin’ pretzel sticks?! I SO EXCITED!

These cake pops started as a bright spark of inspiration from CakeSpy: pops on a pretzel stick! Using an edible, salty vehicle for a sweet treat struck me as absolutely bee’s-knees brilliant. I had to try it immediately.

Then there was this other idea I’d been toying with, too: mixing up no-bake cheesecake filling, freezing it into little pearls, and hiding the pearls in the center of each cake ball. A cheesecake-stuffed cake ball on a pretzel stick? It couldn’t get any better — unless you used an amaretto-spiked version of the best pound cake in the world for your cake!

This cake pop endeavor turned out so easy and so fantastic. I made a video tutorial (located at the bottom of this post) so that you can follow along with the steps as you make them; it’ll show you how to pipe your cheesecake centers, form the cake balls around them, insert the pretzel sticks, and dip and decorate the pops.

But the cake pop tutorial isn’t the only video I made.

What can I say, Rebecca? These cake pops just made me wanna sing! So here’s my tone-deaf tribute to plucky middle schoolers, cake pops, and YOU. Thanks for the fun!

P.S. I have a newfound respect for you after trying to sing this song a billion times and realizing I was basically the worst singer on the planet.

Strawberry Cheesecake Stuffed Amaretto Cake Pops (on Pretzel Sticks!)


Recipe by: Willow Bird Baking
Yields: about 40 cake pops
Print this Recipe

Cream Cheese Pound Cake Ingredients:
3/4 cups butter, softened
4 ounces cream cheese, softened
1.5 cups sugar
3 large eggs
3/4 tsp vanilla
1/4 cup amaretto
1.5 cups flour
pinch salt

Strawberry “Cheesecake” Ingredients:
1 8-oz. package cream cheese, softened
2 tablespoons sugar
1/2 cup diced strawberries

Cream Cheese Frosting Ingredients:
4 oz. cream cheese, softened
1/4 cup (1/2 stick) of butter, softened
1/4 teaspoon vanilla extract
1 cup confectioners’ sugar, sifted

Other Ingredients:
2 pounds candy melts (I chose light pink)
about 40 pretzel sticks (I used Snyder’s because they were longer and sturdier than others)
white chocolate or candy melts for drizzling

Directions:
*NOTE: See the cake pop video tutorial below to see many of these steps being completed!

Make the pound cake: Preheat oven to 300 degrees F. Butter and flour a loaf pan. Beat butter and cream cheese at medium speed of an electric mixer 2 minutes or until creamy. Gradually add sugar and beat 5-7 minutes until light and fluffy. Add eggs, one at a time and beat only until yellow disappears. Stir in vanilla and amaretto.

Combine flour and salt and add to creamed mixture beating on low speed of electric mixture just until blended after each addition. Fill a 2-cup ovenproof dish with water and place in oven with cake (keeps it moist!). Bake at 300 degrees for about 1 hour and 20 minutes, or until a knife inserted into the middle comes out clean (check in several areas of the cake to be sure it’s completely done). You may need to cover cake with foil the last 20-30 minutes of baking if it looks like it’s getting too brown on top. Let cool on wire rack for 10 minutes then remove from the pan by inverting it into a bowl. Once cool enough to handle, crumble the cake in the bowl, removing any hard outer crust portions. Let cool completely.

Make the strawberry cheesecake middles: While the cake is baking, mix all the cheesecake ingredients together well. Fill a gallon sized plastic zip bag with the mixture and cut off the corner (big enough so that the diced strawberries won’t get stuck). Pipe the cheesecake mixture into small swirls on a silicone mat or wax paper (see video tutorial below to see this step). Freeze these until firm.

Make frosting: Mix all frosting ingredients together on medium-high speed until combined. When cake is cooled and crumbled, mix frosting into it until you reach a dough-like consistency. I used most of my frosting but not quite all of it.

Make cake balls: Once your cake mixture is ready and your cheesecake middles are frozen firm, you’re ready to assemble your cake balls! Take a frozen cheesecake middle and pack some cake around it. Roll it into a ball and place it on a silicone mat or wax paper. Continue until all cake balls are rolled. Chill these in the refrigerator overnight. I don’t freeze mine like some sites suggest, because I find chilling them in the fridge instead reduces cracking after I dip them.

Mount and dip cake balls: After cake balls have chilled overnight, melt your candy melts according to the package directions. I keep my bowl of candy melts situated in a bigger bowl of hot water to keep them warm and fluid, but be careful no water gets into the melts! To mount each cake ball, take a pretzel stick and dip the end in candy melts. Gently but firmly push the end of the pretzel stick into the cake ball. Put these back on their silicone mat or wax paper to chill. Repeat until all cake balls are mounted and chill for about 30 minutes.

After chilling, you’re ready to dip! Dip each cake ball into the candy melts, using a spoon to help coat them. After dipping, hold your cake ball over the bowl and gently bounce to drain the excess off. Turn the pop as you drain. When well-drained, gently place the pop in a foam block to continue drying. I placed mine in the fridge to reduce drying time.

Decorate dried pops: Once your pops are dry, melt some white chocolate according to package directions. Let it cool slightly before spooning it into a small plastic zip bag with the tiniest bit of the corner cut off. With the pops standing in their foam block, quickly and confidently pipe a zigzag design over each one. Let these dry. Serve immediately or store in an airtight container in the refrigerator.

VARIATIONS:
-You can leave the cheesecake middles out of this recipe and roll the cake into a solid ball if you want traditional cake pops.
-You can use any flavor of cake (or even a cake mix) for your cake, but this one is absolutely the best I’ve ever had!
-You can leave the strawberries out of your no-bake cheesecake mixture or even add in other berries, chocolate, etc., to produce different flavors of cheesecake in the center.
-You can use lollipop sticks instead of pretzel sticks, or leave the sticks out altogether and make regular cake balls instead of cake pops.
-You can decorate with sprinkles instead of zigzags.

And just for my lovely Willow Bird Bakers, here’s a tutorial for how to make cheesecake stuffed cake pops. This video would also be useful for making regular cake pops. WBB is all about inspiring kitchen confidence in home cooks by encouraging them to tackle challenges — so if you’ve never made cake pops before, this is your double-triple-dog dare! Get in the kitchen and try it out! Don’t forget to snap some photos of your finished product for us to see!

If you liked this post, please:
Subscribe to Willow Bird Baking
Follow Willow Bird Baking on Twitter
Follow Willow Bird Baking on Facebook
Give this post a thumbs up on StumbleUpon


ShareOther ways to share this post with friends!

Mini Doughnuts for Your Coffee Cup (a creative use for yeast dough scraps!)

I baked something so flippin’ fantastic this weekend that I cannot wait to tell you about it. Except that telling you about it involves a video tutorial. And a video tutorial involves hours of editing. So while that’s going on, I’ll share this other flippin’ fantastic idea.

Naturally, you’re planning to make doughnuts, right? Or perhaps you have some other yeast dough plans in the works? After rolling and cutting, you’re bound to have scraps of dough lying about unused.

Personally, I’ve always been a re-roller, piling the dough scraps together and rolling them out again to try to get a few more pastries. The resulting goods will be a little tougher, but it seems like a waste otherwise.

As I was browsing through doughnut recipes, however, I saw these sweet miniature doughnuts used as coffee (or hot chocolate!) cup decorations. They were the perfect use for dough scraps!

After cutting out all of my doughnuts, I used a couple of smaller cookie cutters to cut out these minis. I proofed them with my regular doughnuts, fried them quickly on both sides in 350 degree oil, drained them on a paper towel lined plate, and then rolled them in a mixture cinnamon and sugar. They were hot, fluffy, and as cute as a button on a kitten carrying a cupcake. Translation: adorable.

P.S. – While poking about, I found a fun tip for using yeast dough scraps for savory dishes. Now you have sweet and savory ideas in your tool belt!

P.S. 2 – I wish I could find the site where I originally saw these coffee cup doughnuts; I like to put up a link if something inspires me. If you stumble across it, let me know.

If you liked this post, please:
Subscribe to Willow Bird Baking
Follow Willow Bird Baking on Twitter
Follow Willow Bird Baking on Facebook
Give this post a thumbs up on StumbleUpon


ShareOther ways to share this post with friends!

Maple Bacon Doughnuts

My mom trudged through four years of college with four kids to earn her nursing degree (and graduated magna cum laude, she will promptly — and repeatedly — inform you).

Her job as a nurse left her with little time or energy to spend on being an extraordinary entertainer, something she’s always had an innate talent for. One day as a small girl, though, I went to forage in the kitchen and found her frantically frying doughnuts.

There was literally a multi-tiered tower of doughnuts on the kitchen table. There were more doughnuts bouncing around in hot oil on the stove. There were pale, puffy rings on the counter waiting for their turn in the stock pot.

And then there was little Julie in the middle of the madness — and I was all about eating some doughnuts.

Mom immediately shattered my doughnut devouring dreams, though, explaining that her friends from work were on their way to discuss some adultish, worky things, and that the doughnuts were for them. I had thoughts of launching an all-out siege à la Hyperbole and a Half, but managed to control myself.

When the ladies arrived, Mom was somehow curled and coiffed, standing in a clean kitchen, and wearing a cute outfit. The tower of doughnuts beckoned enthusiastically from the table as she invited each of her friends to sit and poured them coffee. I watched in eager anticipation, certain they were about to notice the doughnuts and react with appropriate awe.

But they didn’t.

No worries. My mom would offer them the doughnuts in a moment, and they were probably just waiting on that polite social cue to reveal their utter amazement. Sure enough, she gestured toward one of tiers resplendent with multicolored rings, saying, “Would you like a doughnut?” But the unthinkable happened.

“Oh, no thanks.”

That’s right. Those ladies did not eat a single doughnut. They were dieting, or they weren’t hungry, or some such something.

My mom carried on warm conversation, refilling their coffee like nothing had happened. Like fresh homemade doughnuts just appeared on her kitchen table any old day! Like she hadn’t just spent literally hours making them from scratch!

At 7 or 8 years old, I was not so deft a hostess. I sort of wanted to grab one of those ladies by both shoulders and give her a good shaking, screaming, “SHE MADE YOU HOMEMADE DOUGHNUTS, WOMAN!” I had seen Mom’s hours of hard work, and I was heartbroken for her.

The ladies left before too long, having accomplished their adulty, workish business, and the doughnuts still sat undisturbed on the table. I could tell Mom was sad about it, despite my assurances that I would both eat and enjoy every last one.

Seriously, who turns down a homemade doughnut?! In fact, who turns down ANY version of a yeast doughnut?! (Those cakey things are another story altogether; you’ll have to forgive my obvious bias.)

Indeed, Mike’s mom told me a story years ago about when she was in school. She and her friends would wait for the “Hot Doughnuts Now” sign to come on at the nearby Krispy Kreme, drive over, and eat a dozen doughnuts each. That’s the power of a yeast doughnut. (And youthful metabolism).

Well, in honor of my mother and doughnut lovers everywhere, I made a variety of filled doughnuts last weekend. I’m still tweaking my super secret version — and will share it soon, along with a great little trick for using yeast dough scraps — but this flavor combination I found on Cherry Tea Cakes had me immediately intrigued. Maple Bacon Doughnuts!

They don’t just sound amazing; they are amazing! And even though it may seem like a trendy flavor combination, these are not simply novelty doughnuts — they taste flippin’ awesome. They’re pillows of salty-sweet, doughnut-pancake, breakfast-dessert heaven. I feel like I should be confused, but I’m not. I just want another one.

While we’re talking doughnuts, we might as well jump in the fray: Are you a cake doughnut or yeast doughnut person?

Maple Bacon Doughnuts


Recipe by: Adapted from Cherry Tea Cakes
Yield: about 12 3-inch doughnuts

Doughnut Ingredients:
1 0.25-ounce package yeast
2 tablespoons hot water, roughly 110 degrees in temperature
3/4 cups milk, scalded (heated to a slight simmer-not a boil) and cooled
1/4 cup sugar
1/2 teaspoon kosher salt
1 egg
2 tablespoons and 2 teaspoons shortening
2 1/2 cups all-purpose flour
vegetable oil for frying

Maple Mousse Filling Ingredients:
1/2 cup pure maple syrup
2 large egg yolks
1 1/4 teaspoon unflavored gelatin
3/4 cup whipping cream

Maple Glaze Ingredients:
2 tablespoons plus 2 teaspoons bacon grease/melted butter
1 cups powdered sugar
5-6 tablespoons maple syrup
about 1/2 pound bacon, for topping

Directions: Make the doughnut dough: Dissolve the yeast in warm water in the bowl of your stand mixer, and then let it sit for about 5 minutes. The yeast should foam to show that it’s active. Beat in milk, sugar, salt, eggs, shortening, and 1 cup flour (scraping down bowl when needed). Beat on medium speed for 2 minutes to fully combine. Mix in remaining flour completely. Cover this dough and let it rise in a draft-free place (I warm my oven for a few seconds on 200 degrees just to get the chill out — make sure it’s not hot! — and then put my dough in there to rise) until doubled, about 50-60 minutes.

Make the Maple Mousse: While the dough is rising, bring maple syrup to a boil over medium-high heat. In a separate bowl, whisk together egg yolks. Pour about 1/4 cup of the hot maple syrup into the egg yolks, whisking constantly, to temper them and be sure they won’t cook from the heat. Then whisk the egg yolks into the maple syrup. Whisk constantly until the mixture reaches about 170 degrees F on a candy thermometer. In a separate bowl, measure out 1/4 cup of the whipping cream and sprinkle the gelatin over it to soften. Let it sit for about 5 minutes before mixing a couple of tablespoons of the warm syrup mixture in and stirring to dissolve the gelatin. You can heat for 10 seconds at a time, stirring between each, to ensure the gelatin is dissolved. Whisk this mixture into the syrup mixture, and then whisk it occasionally for the next hour while it cools.

Beat the remaining cream to soft peaks. Stir about a third of it into your now-cool maple syrup mixture to lighten it, and then gently fold the remaining cream into it. Refrigerate for at least an hour while you complete the rest of the components.

Make your doughnuts: Flour a surface well and turn your doughnut dough out onto it, flouring the dough as well. Gently roll the dough out to 1/2-inch thick and cut into solid rounds with a 3-inch cooking cutter. Place each round on a baking sheet and let these rise until doubled, about 30-45 minutes. About 25 minutes into their rise time, start heating your oil in a heavy, deep stock pot to 350 degrees F on a candy/fry thermometer.

Cook bacon topping: Preheat oven to 400 degrees (only once your doughnuts aren’t in there rising!) Cover a baking sheet with aluminum foil and lay your bacon slices out side by side. Bake for 15-20 minutes or until crisp. Remove bacon to a paper towel lined plate, reserving the bacon grease in a small bowl. When cool, crumble bacon up.

Fry your doughnuts: Gently lower 2-3 doughnuts at a time into hot oil with a slotted spoon. Fry about 1 minute on each side or until golden brown. Remove to a paper towel lined plate to drain.

Make the Maple Bacon Glaze: Add enough melted butter to your bacon grease to make it 2 tablespoons and 2 teaspoons worth. Whisk this together with the confectioner’s sugar until combined. Add maple syrup one tablespoon at a time until you reach desired consistency. Set aside.

Assemble doughnuts: Use a chopstick or butter knife to poke into each doughnut and “sweep” gently to create a pocket. Pipe mousse into each doughnut using a piping bag. Then dip them in the glaze and sprinkle cooked bacon on top. Best eaten the same day.

If you liked this post, please:
Subscribe to Willow Bird Baking
Follow Willow Bird Baking on Twitter
Follow Willow Bird Baking on Facebook
Give this post a thumbs up on StumbleUpon


ShareOther ways to share this post with friends!

1 91 92 93 94 95 127